Isn’t integration with external software products a major pain? Especially when you are required to make changes in the codebase for your mobile app or website. You have to go through the usual rigmarole of requesting your engineering team to make changes, coordinating between your engineering team and the software vendor’s success team, waiting for the release to happen a few weeks later etc. only to find out later that you made some mistake somewhere in the integration. And you’re back to the drawing board!
Wouldn’t it be wonderful if the entire integration process was somehow made very simple? Wouldn’t it be great if you did not have to refer to the documentation for every small step that you need to follow?
We, at WebEngage, concur. Today, we’ve released a new functionality which makes the process of integrating WebEngage with your mobile apps or website a breeze.
No really, what’s this about?
In order to use WebEngage, you first need to integrate your website, Android app and iOS app with WebEngage. The methods of integration can be many – you could use Segment.com or Google Tag Manager to perform the integration or you could directly put the WebEngage SDK in the codebase for your mobile apps or website.
You also need to ensure that all the channels of engagement with your users are also set up properly. These include Push Notifications, In-app Notifications, SMS, On-site Notifications/Surveys/Feedback, Web Push and Email.
In our latest release, we’ve made this entire process so easy that you get done with integration in minutes. Yes, minutes.
Let’s get into the details
On the WebEngage SDK Integrations page, you’ll see two sections – Integration Status and Integration Steps for each of your sources – Website, Android app and iOS app. Integration Steps tell you the exact steps you need to follow in order to integrate the source (Website, Android app or iOS app) with WebEngage. Integration Status tells you whether each of the steps in Integration Steps is pending or complete.
Let’s take Android as an example. When you go to the Android section under SDK in the WebEngage dashboard, you’ll see both these sections – Integration Status and Integration Steps.
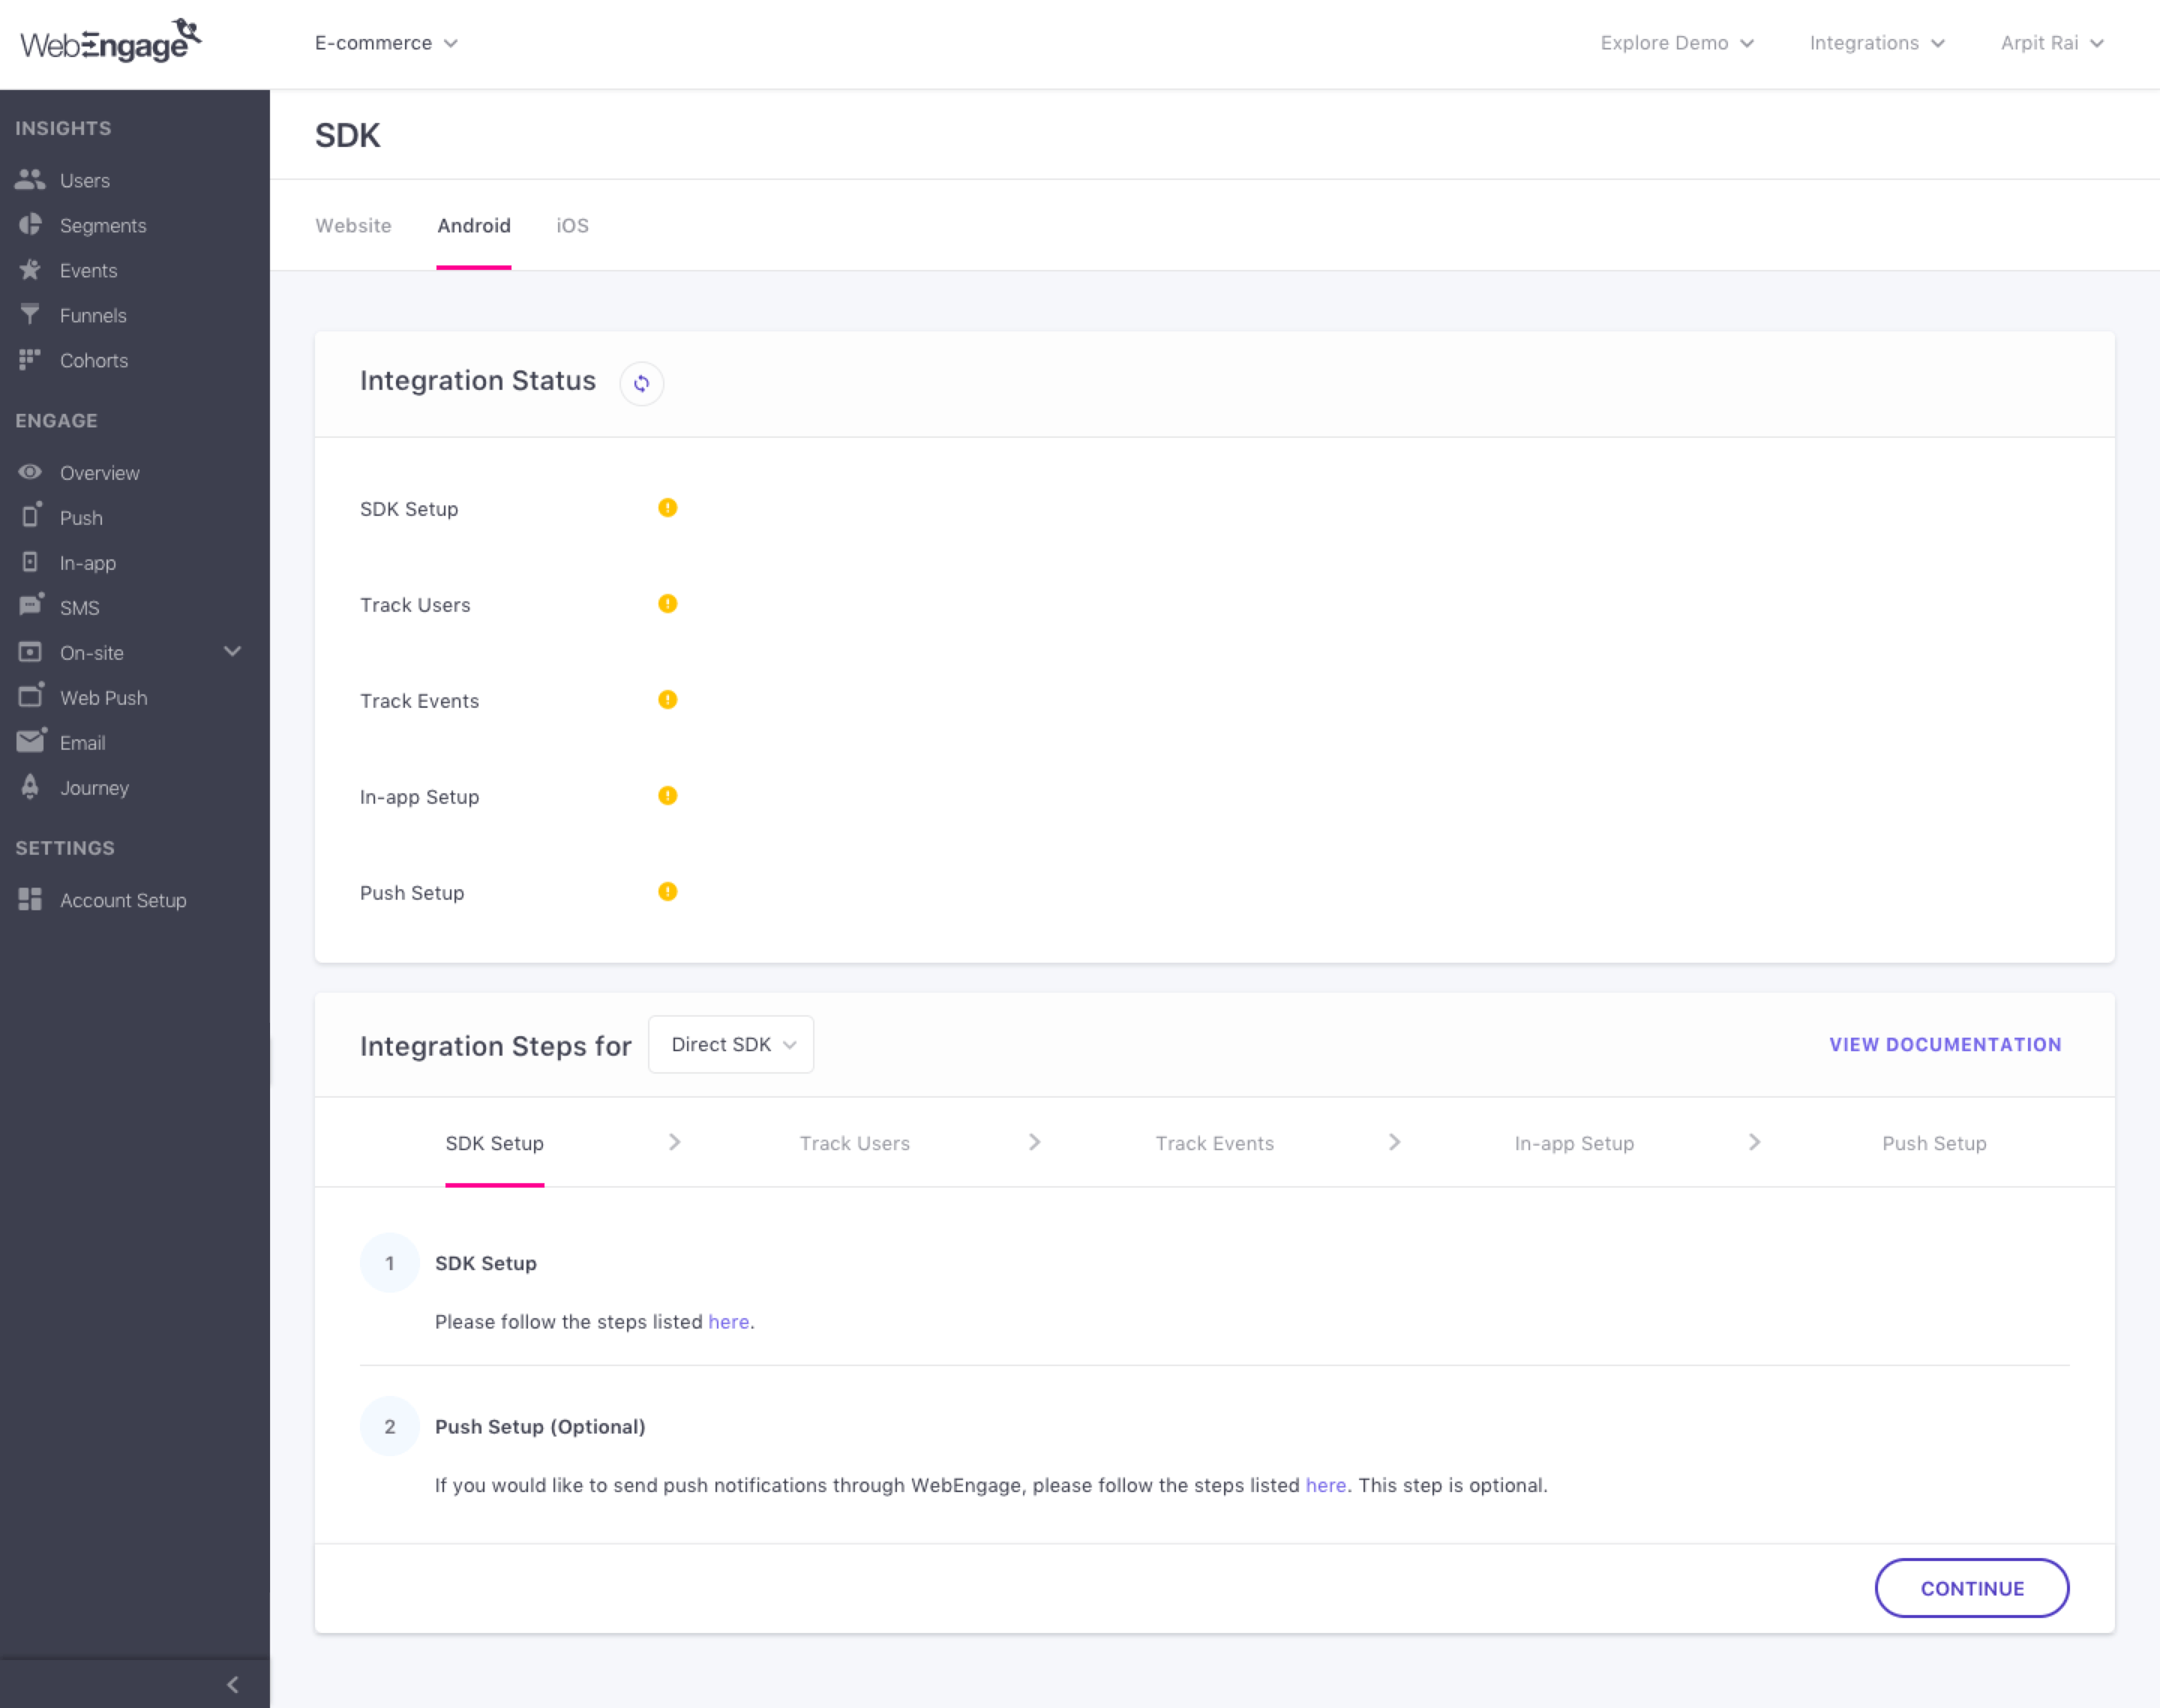
When you click on Continue under Integration Steps, you will be able to view each of the different steps in the integration.
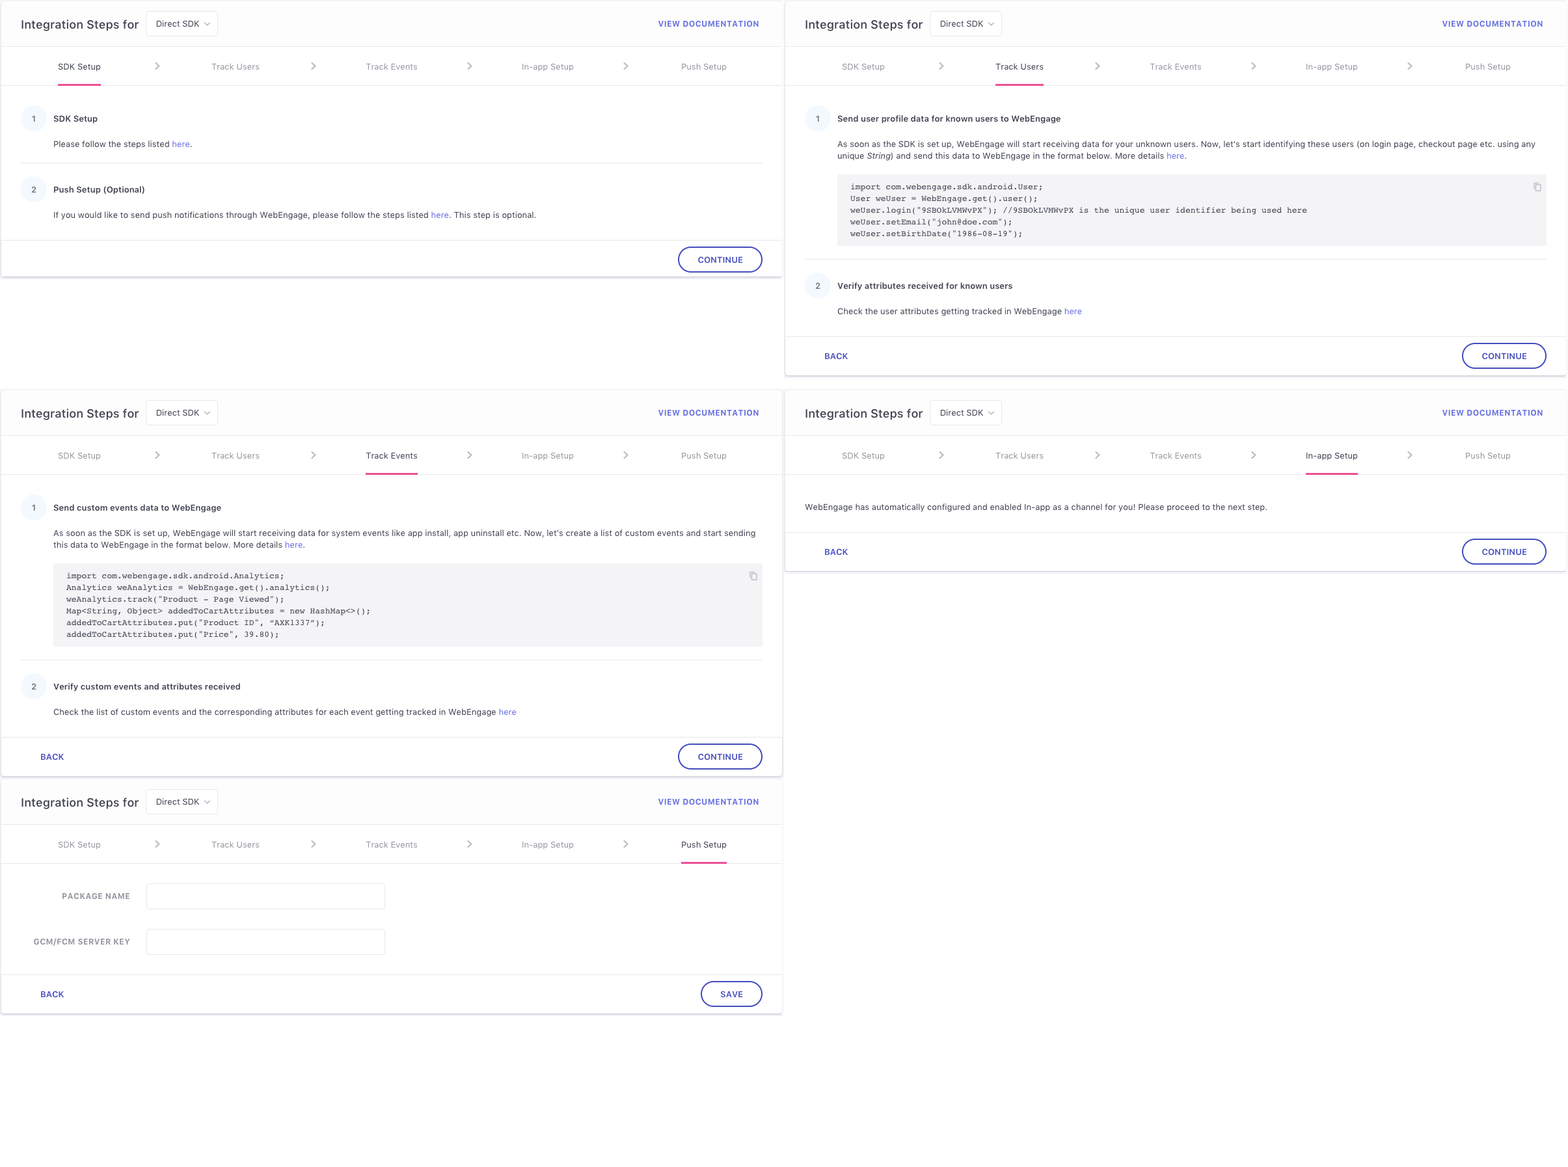
By default, you’ll be shown steps for the Direct SDK integration method that involves putting the WebEngage SDK in your Android app’s codebase. You could change the method to Segment.com or Google Tag Manager to view the integrations steps for those methods of integration. You can also find a link to the relevant documentation under Integration Steps that you can refer to for more details of the integration.
As and when you complete each step of the integration process, you could check the Integration Status section to see whether the step has been successfully completed.
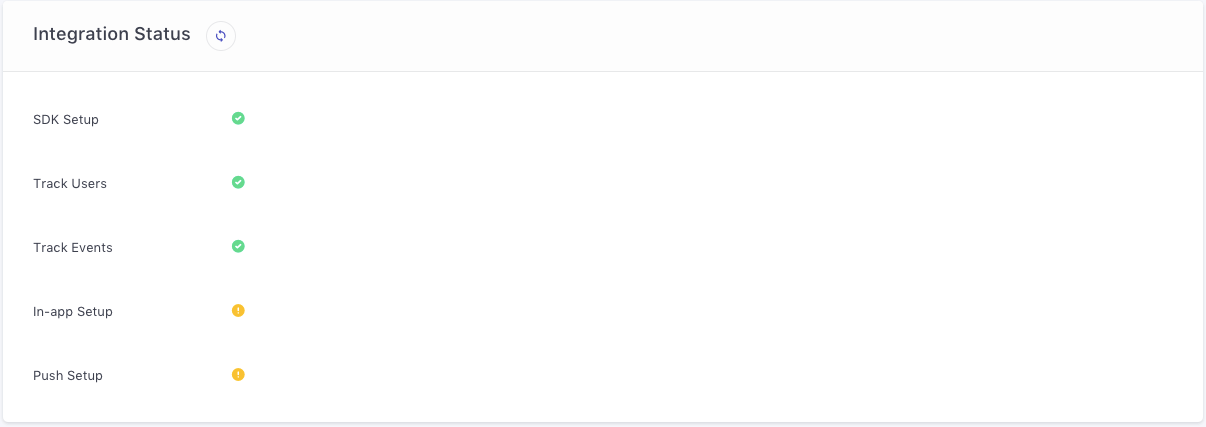
As you can see above, we’ve completed 3 of the 5 steps in the Android integration process for the Direct SDK method. The yellow signal denotes that the specific step of integration is pending. The green signal denotes a successful completion of that step of integration.
Lastly, we’ve also introduced a section which gives you a quick status of all the steps of integrations for your SDK and Channels.
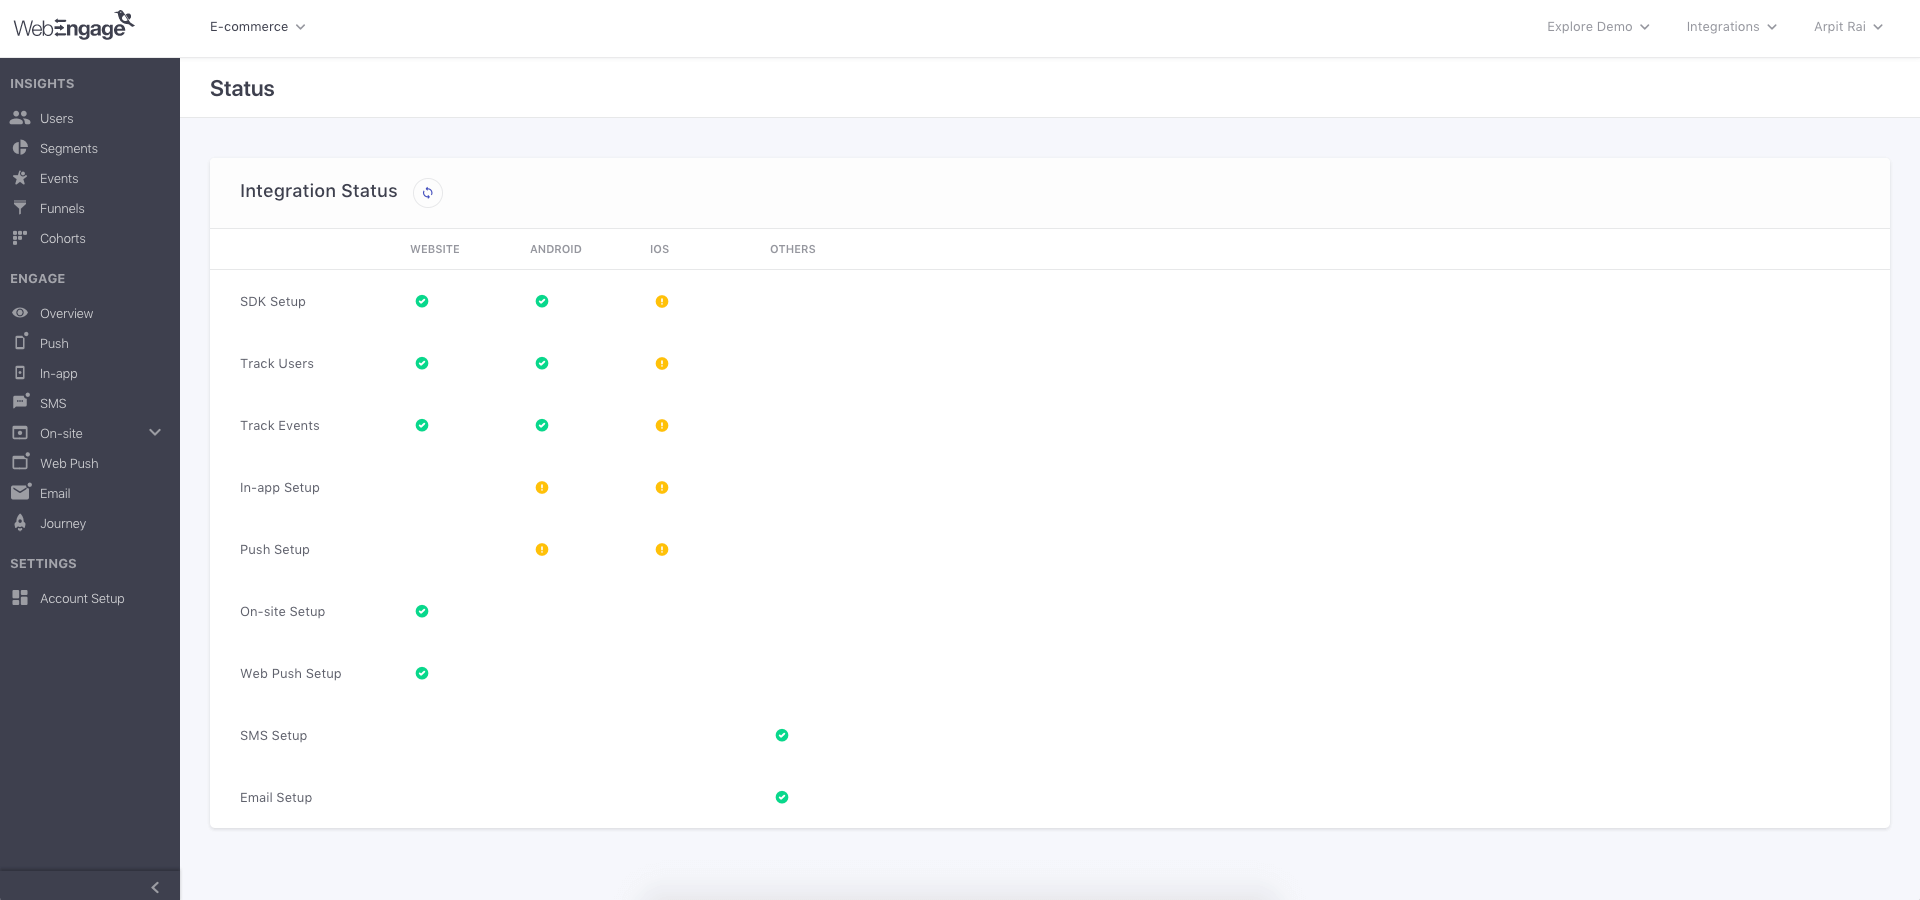
As you can see in the example above, we’ve completed all the steps of integration for the Website. The Android integration is partially complete. And we haven’t started the iOS integration as yet. You can also see the status of the two channels – SMS and Email, that are not necessarily dependant on any SDK integration. In our example above, we’ve completed the integration steps for both SMS and Email.
Doesn’t that cumbersome and complicated integration process seem so much easier now? Isn’t the process above as easy as going through a checklist of things you’re required to complete and crossing the ones you’ve already completed?
By the way – we also have readily available integrations with other 3rd party tools such as AppsFlyer, TUNE and Adjust. Please refer to our documentation for more details.
Try out our new feature and tell us what you think of it! Or request a demo from our Success team to learn more about this feature.





 Harshita Lal

 Ananya Nigam

 Prakhya Nair


