We are excited to introduce Role-Based Access Control (RBAC) to our product stack – boosting the data protection security and access control management for you and your team. We have revamped and renamed our ‘Account Admins’ section to ‘Team’ to suit our current product stack letting you more flexibly manage users and their permissions.
What is WebEngage RBAC?
When it comes to implementing policies and procedures to protect your data, there are a number of ways to do it, including the use of access controls or RBAC.
On WebEngage you now get the flexibility to manage the flow of information and grant permissions to your team members on an individual level or basis every project. Every access that is granted can be reversed if needed. For example, if your team member needs access to the data of some other team for a particular project, they can be granted access for that project only, to ensure tight protection of the data.
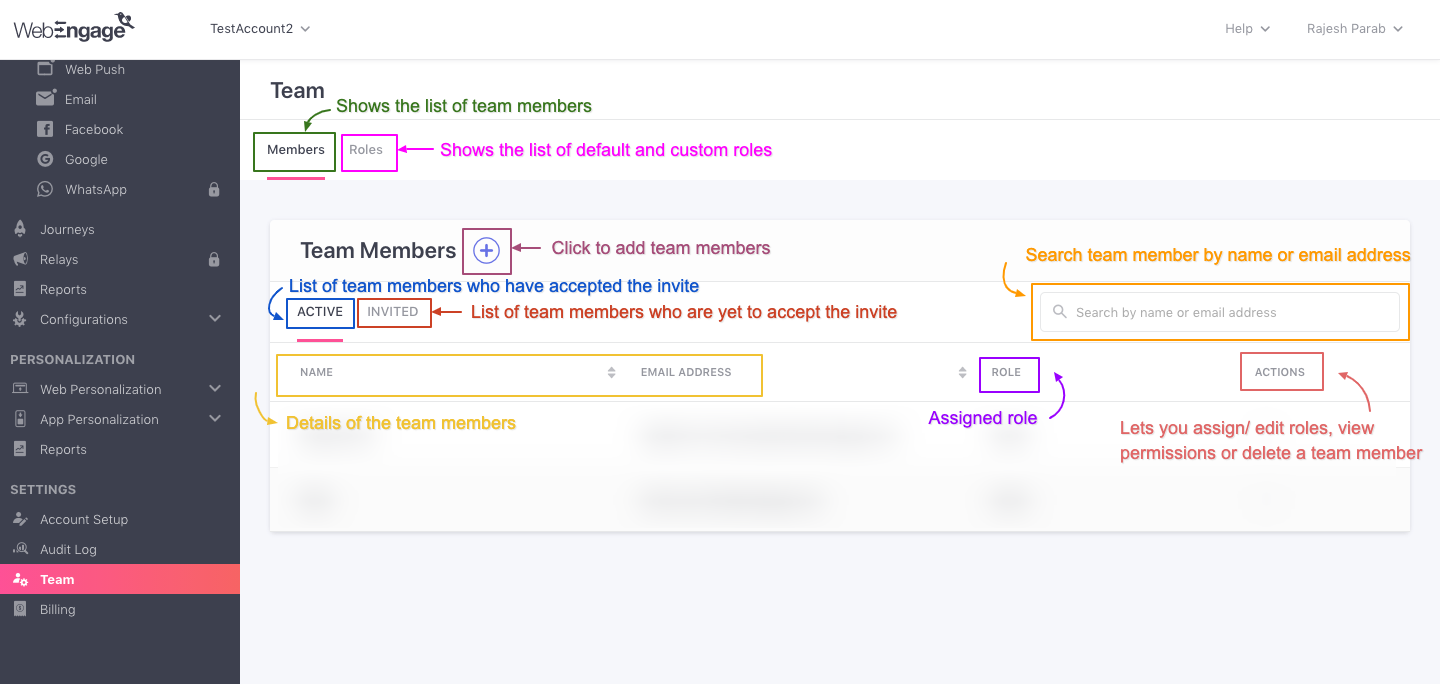
Once you visit the ‘Team Members’ section on the WebEngage dashboard, you will be able to view the panel with the list of team members with their names and current roles. You can also invite new team members or edit the access of the existing ones from here.
What can you do with WebEngage RBAC?
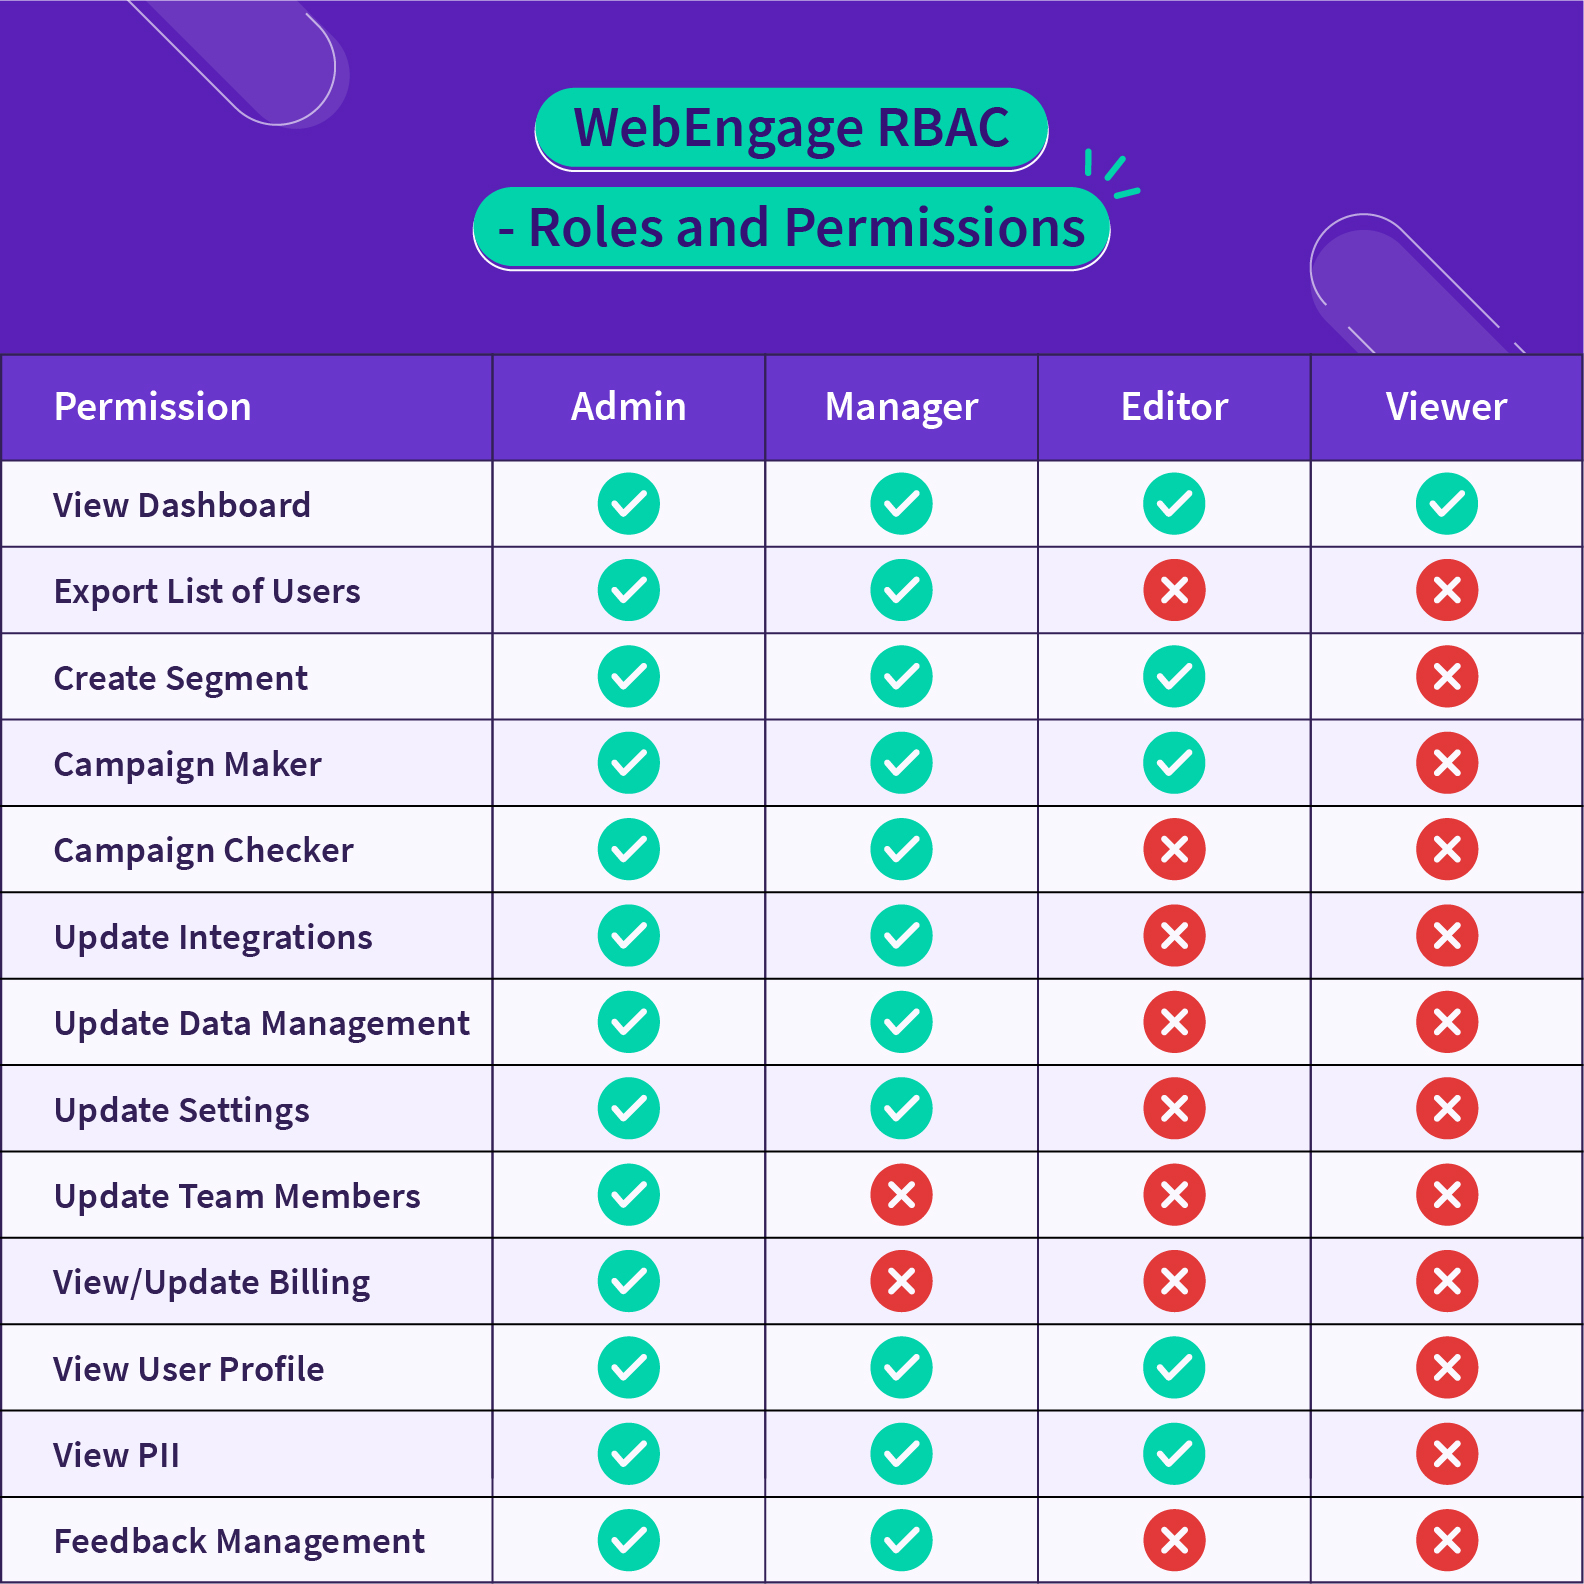
In the WebEngage dashboard, we provide four roles by default – Admin, Editor, Manager, and Viewer. To help you select which role is right for each WebEngage user in your workspace, here is an overview of each role:
- Viewer: Grants the team member permission to view all sections of the dashboard, except the following – Billing section, individual user profiles, and any data marked as PII (Personally Identifiable Information).
- Editor: Grants the team member permission to:
i) view all sections of the dashboard, except the following – Billing section, individual user profiles, and any data marked as PII (Personally Identifiable Information)
ii) create and modify segments
iii) create and modify campaigns, journeys, and relays in a draft or inactive state. - Manager: Grants the team member all permissions except ‘View/Update Billing’ and ‘Update Team Members’.
- Admin: Grants the team member all the permissions.
Here’s a brief of what you can do with WebEngage’s RBAC:
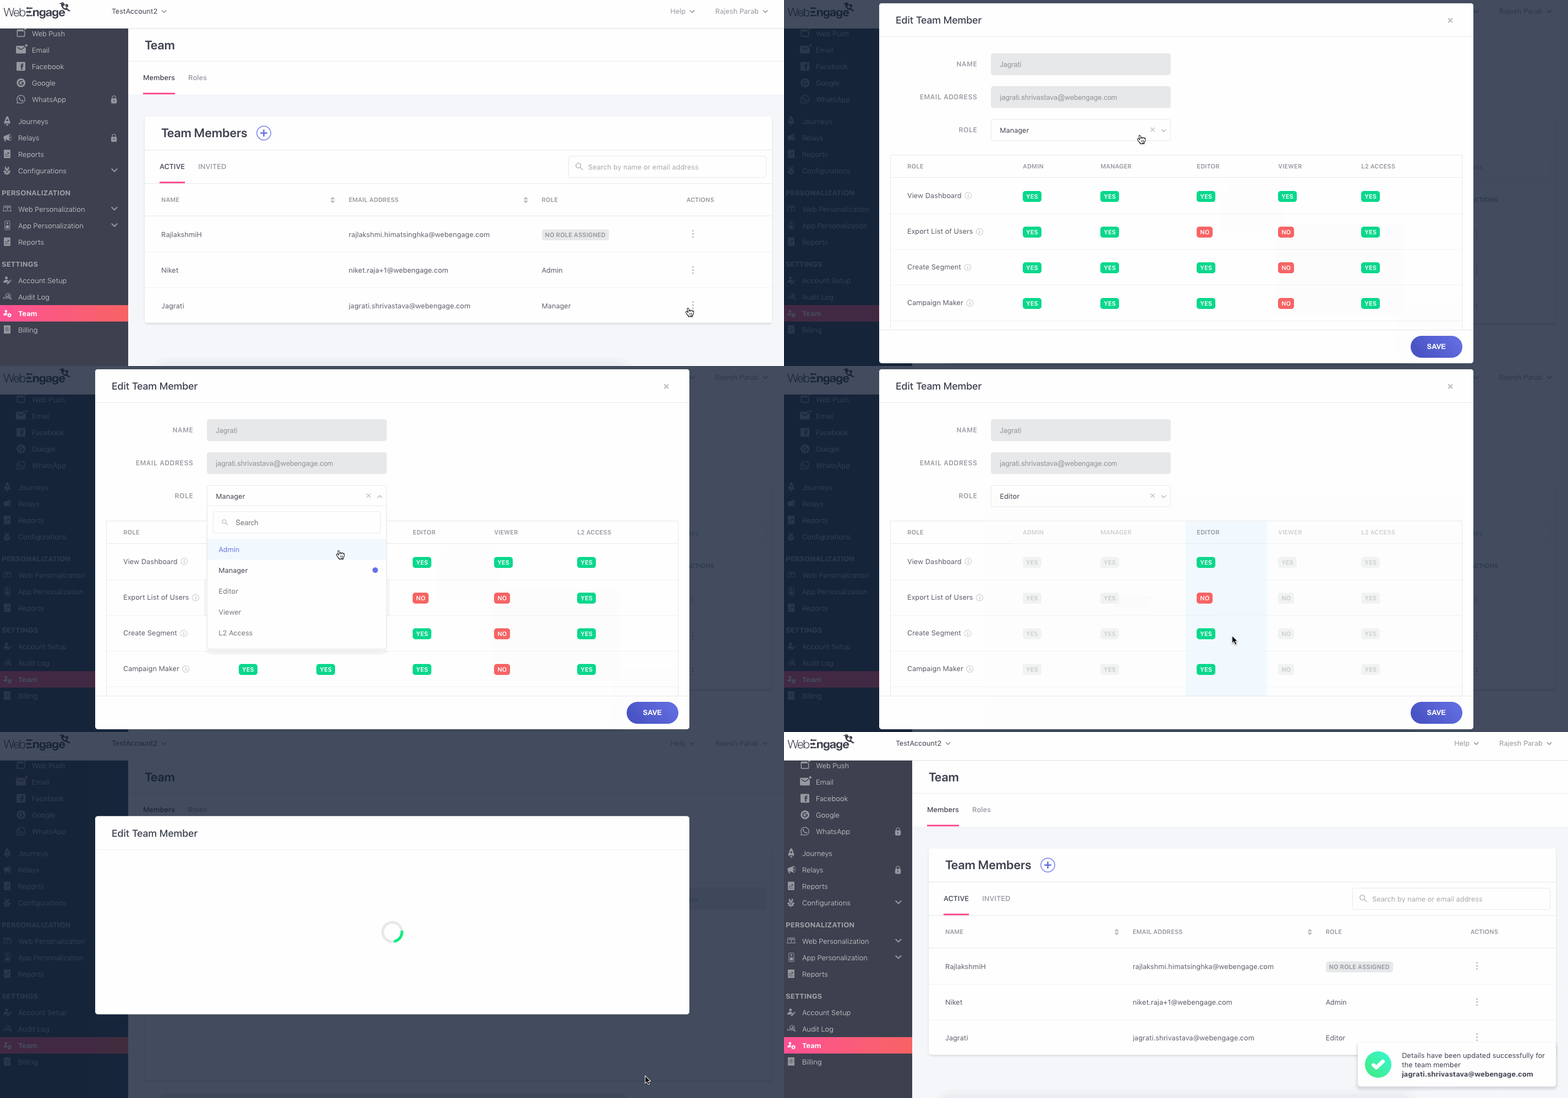
- Edit team member: You can edit each team member’s permission level and access from here, and you will also be able to create a custom role by selecting the required permissions for an individual.
- Invite team members: You can invite a new member to the dashboard by adding their name, email address and selecting a suitable role for them. The user will be able to access the dashboard once they accept the invitation.
- Delete team member: If you wish to remove any team member from the account/dashboard, you may do so by deleting the team member from the list of members.
- Create/edit a custom role: Custom roles are often offered to members who have to wear different hats in an organization and hence need access to various items and data points. In our dashboard, we allow you to create and edit the permissions granted to an individual.
Note: To encourage your team’s data proficiency, we have kept the Data and Insights and the Campaign Manager sections of the dashboard accessible to all, irrespective of their roles.
Best practices for implementing RBAC on your WebEngage account
Implementing RBAC across your entire organization can be a complex process. Here are some best practices to help you ease out the implementation:
- Understanding the scope: Before moving to RBAC, understand what job functions need access to which tools – analytics, campaign management, user data, data management, or other actionable items to support your business functions.
- Define roles and responsibilities: Once you’ve performed the above analysis, create roles around what permissions and functions your team members need and fit into.
- Roll out access in stages: Consider rolling out RBAC in stages to your team members to reduce disruption to the business. Start with your core set of members first and gradually establish it for your entire network.
- Automate user permission management: Managing new users or guest users can be time-consuming and challenging. But having RBAC that defines these roles before a member joins the network helps you grant timely access to them rather than arbitrarily deciding who should get access to which resources.
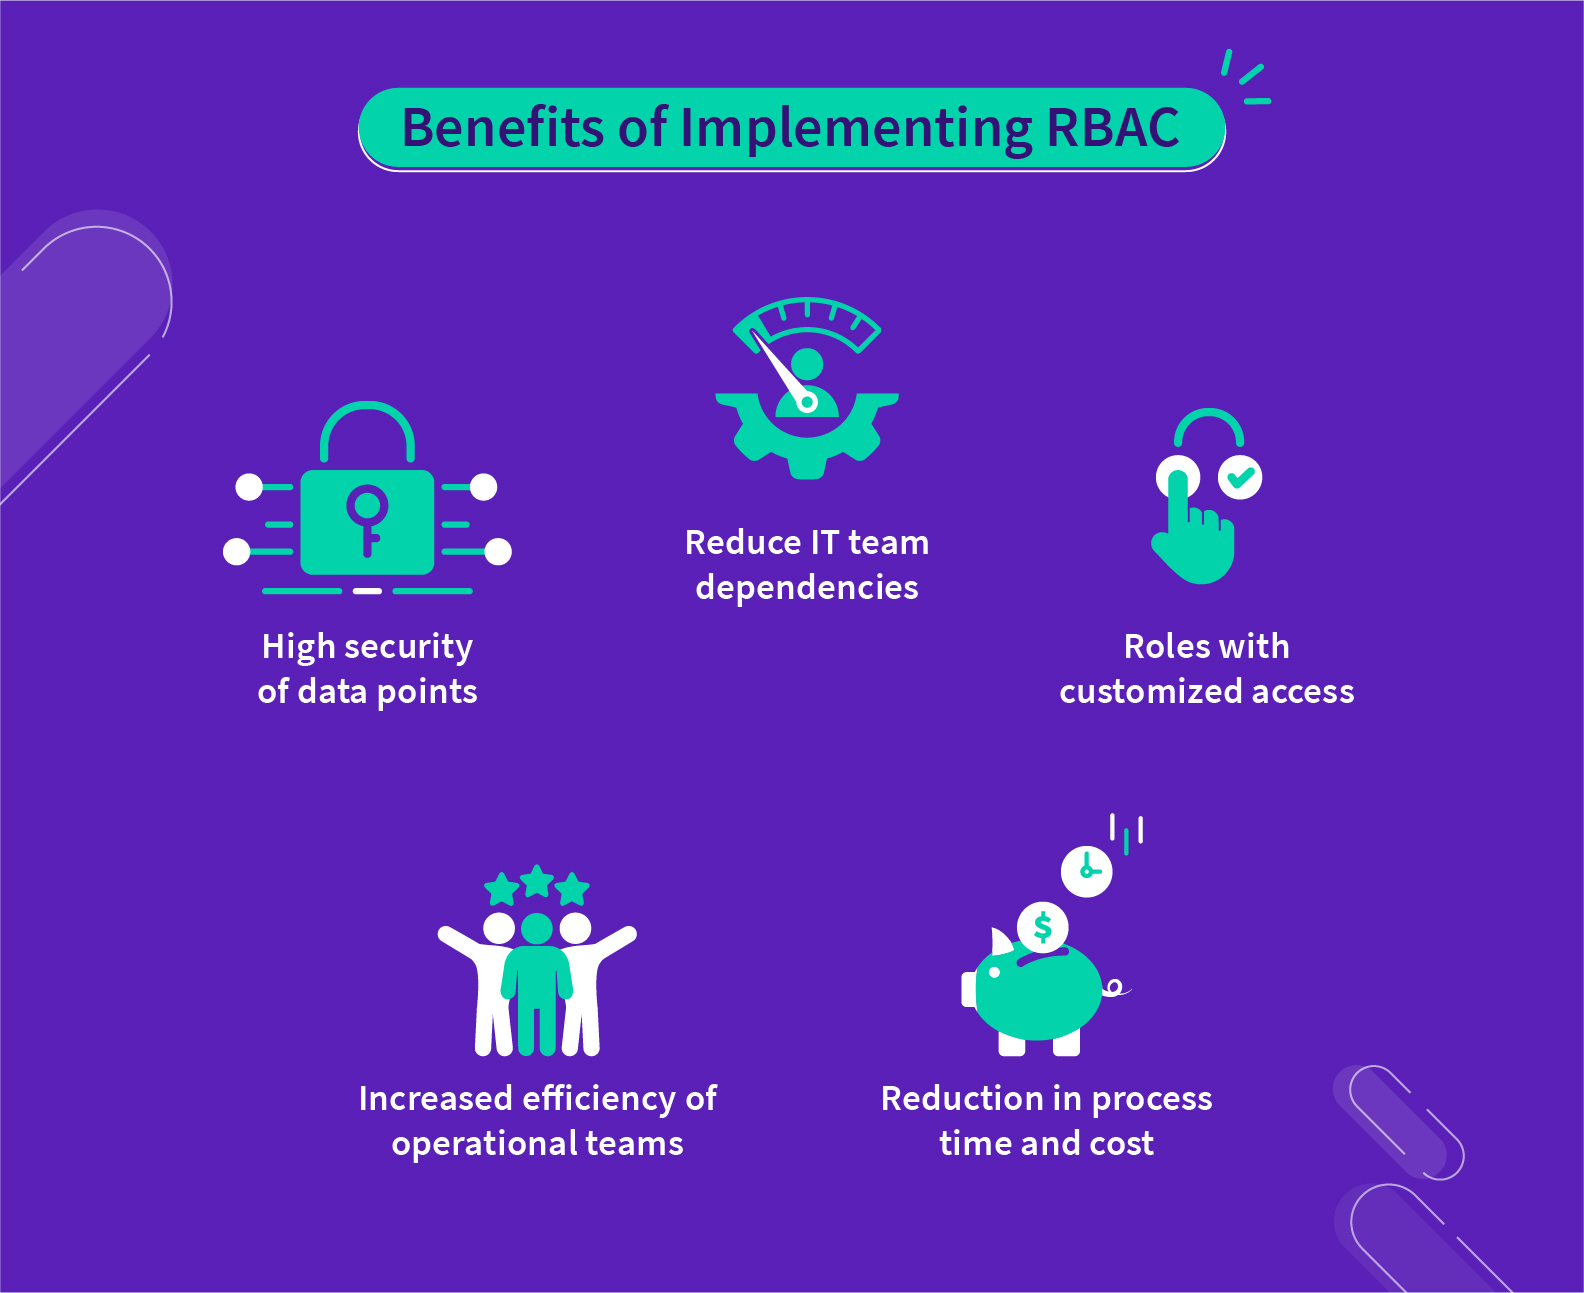
- More right-to-control for Product and Marketing teams: The IT team doesn’t have to manage permissions for every user and can now be done by the Marketing, Product, and Data teams. This makes it easier for the right members to have access to the right tools and data.
- Ensure high security of your crucial data points and actions: RBAC will protect all your important data points like – user details, segments, and more. This is particularly important for financial and healthcare companies that manage sensitive data and need to comply with privacy-by-design.
RBAC is one of the most powerful methods to control the flow of information and data access for your resources. And in WebEngage Marketing Automation, we understand how vital it is for you to ensure the safety of your user data more than anything else. This update will reflect our ongoing commitment to your data security and privacy with WebEngage.
If you are a WebEngage customer and are interested in managing your user permissions, please reach out to your Customer Success Manager or the Support team (support@webengage.com) for access.
Subscribe to our newsletter to stay updated on the latest in B2C marketing





 Harshita Lal
 Inioluwa Ademuwagun
 Diksha Dwivedi
 Ananya Nigam

 Prakhya Nair