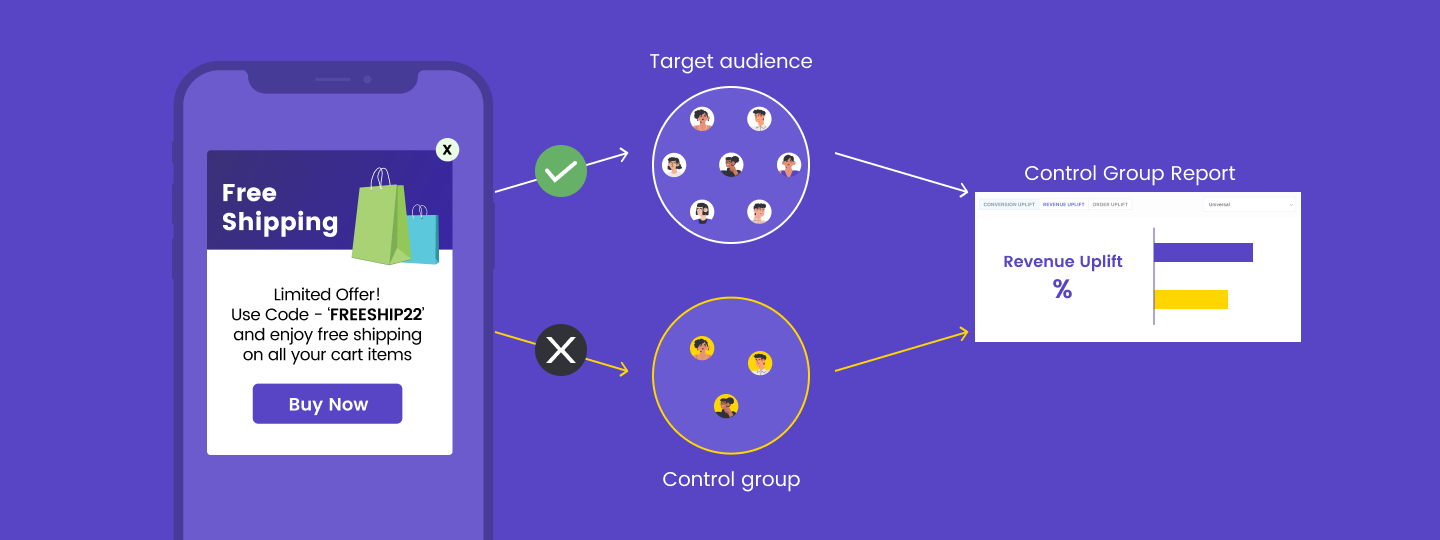
You all know about the custom alerts we launched last year, enabling you to check customer trends, chalk behavior patterns, brainstorm campaign execution, and more.
But let’s do a quick recap anyway.
Custom Alerts allow you to create alerts for specific metrics you want to track. You can use this feature to set a threshold for a particular metric and receive a notification whenever there is any deviation from the set threshold.
Why is that important?
Because as a marketing manager, you are likely responsible for overseeing multiple campaigns, channels, and metrics, making it challenging to stay on top of everything.
Custom alert helps you proactively monitor your data without logging into your dashboard whenever you want to track a specific event. It enables you to manage your workload more efficiently by allowing you to stay informed and take action when necessary.
How can you create an alert?
- Select the metric (event) to track,
- Define the threshold limits and alert frequency,
- Set the notification settings,
And you’re done!
Now, we’ve taken Custom Alerts a step further.
In phase 2, we’re making it more efficient, faster, and more functional to use for you.
Let’s explore.
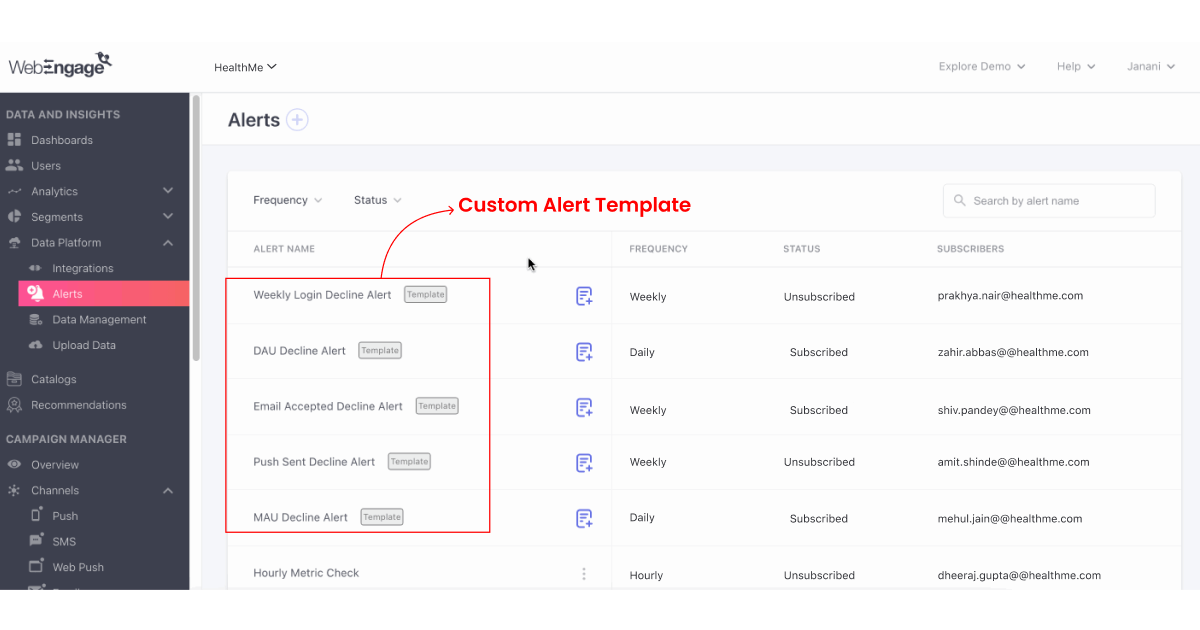
1. Pre-created Custom Alert Templates
What that means: Users can choose from pre-created templates to create alerts for the commonly tracked metrics.
On the tech end: Pre-created alerts will be listed at the bottom of the table, and new alerts will be on the top. A banner template will be present on each of these pre-created templates. Users can edit all template elements and save them.
How it benefits you: You can start tracking your core metrics from the first day of account activation.
There are five types of templates WebEngage offers:
- Weekly Login Decline Alert: An alert template for when the weekly user login count declined by 10% compared to the previous week.
- DAU Decline Alert: An alert template for when the daily active user count declined by 10% compared to the previous day.
- Email Accepted Decline Alert: An alert template for when the Email delivery count declined by 10% compared to the previous week.
- Push Sent Decline Alert: An alert template for when the Push sent count declined by 10% compared to the previous week.
- MAU Decline Alert: An alert template for when the monthly active user count declined by 10% compared to the same day of the previous week.
2. Alerts Based on MAU/WAU/DAU
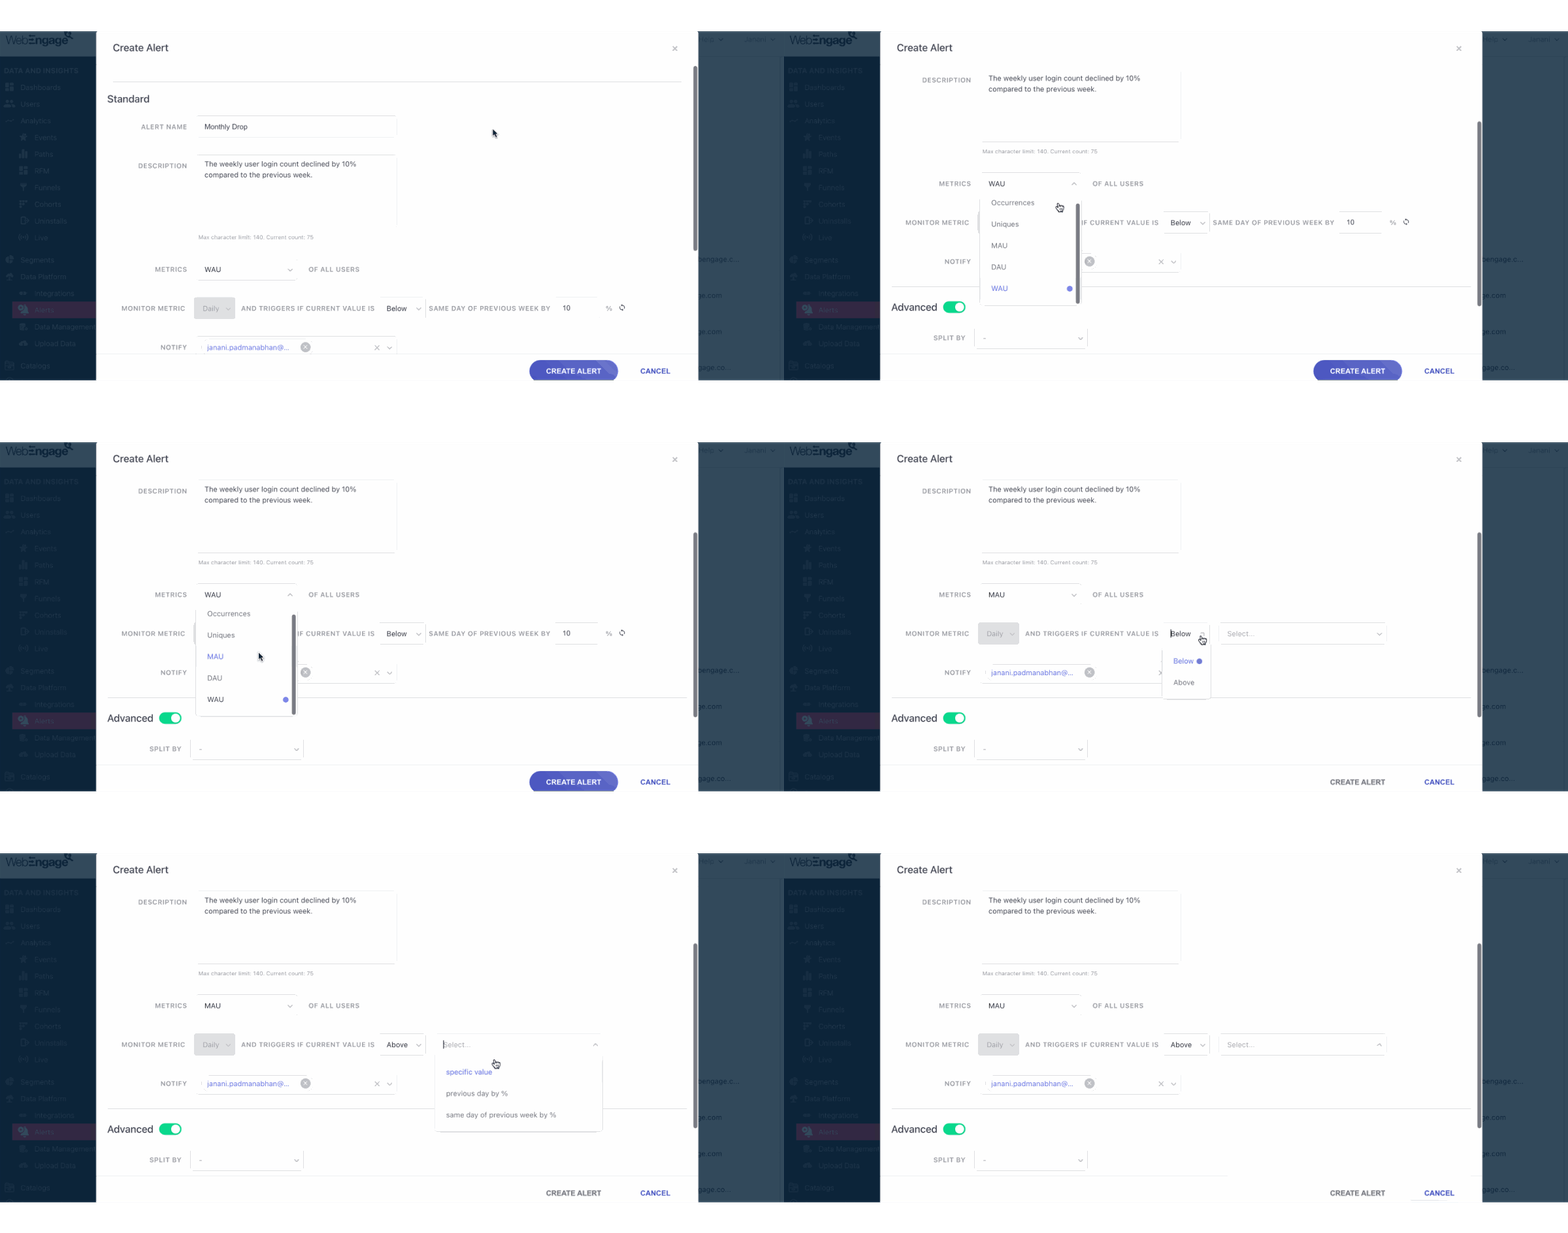
What that means: The real-time monitoring of core metrics like MAU, WAU, and DAU, which also impact revenue, is critical for organizations. To stay ahead of potential issues that might affect these metrics, we have introduced MAU/WAU/DAU alerts.
Why you need it: This feature empowers proactive decision-making and helps maintain optimal performance despite unexpected challenges by promptly notifying users when these metrics deviate from expected levels.
On the tech end: The MAU/DAU/WAU will appear in the drop-down list of metrics. When the user selects any of these options, the ‘of’ will have Known Users, Unknown users, and Default (all users) will be shown.
How it benefits you: A closer and more in-depth look at metrics enables you to tweak campaigns and strategies for a more holistic user experience.
3. Alert Details & Description
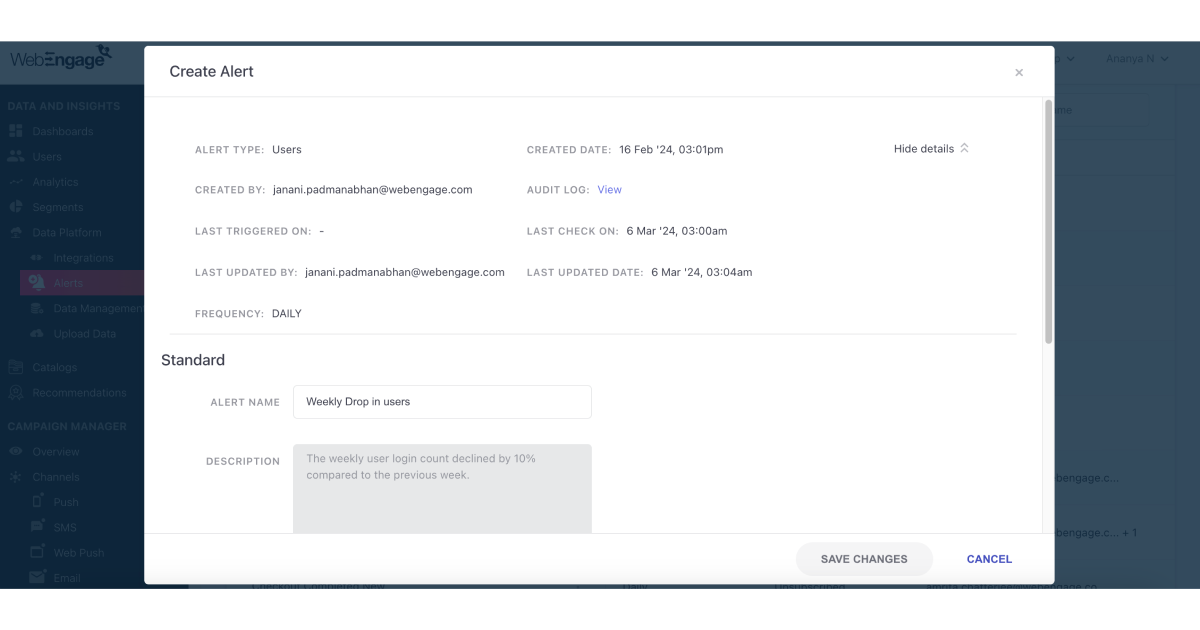
What that means: Alert details consist of information about the type of alert. This means when it was created, by whom, when it was last triggered, checked, and updated, as well as who made the last update, and the frequency of the alert is more accessible.
Why you need it: The team may not have the context for an alert that is set to trigger communication. Putting that in the description will help give more clarity and context to the potential receivers of these alerts.
On the tech end: After the alert name in the CRUD, the option to add an alert description will be available. Here, the user can add a description to the alert to ease understanding for other users going through the alert. The optional description will have a limit of 140 words.
How it benefits you: Ease of access and understanding for multiple users on the same account using these alerts.
4. Revamped UI/UX
What that means: An all-new look for advanced options within custom alerts.
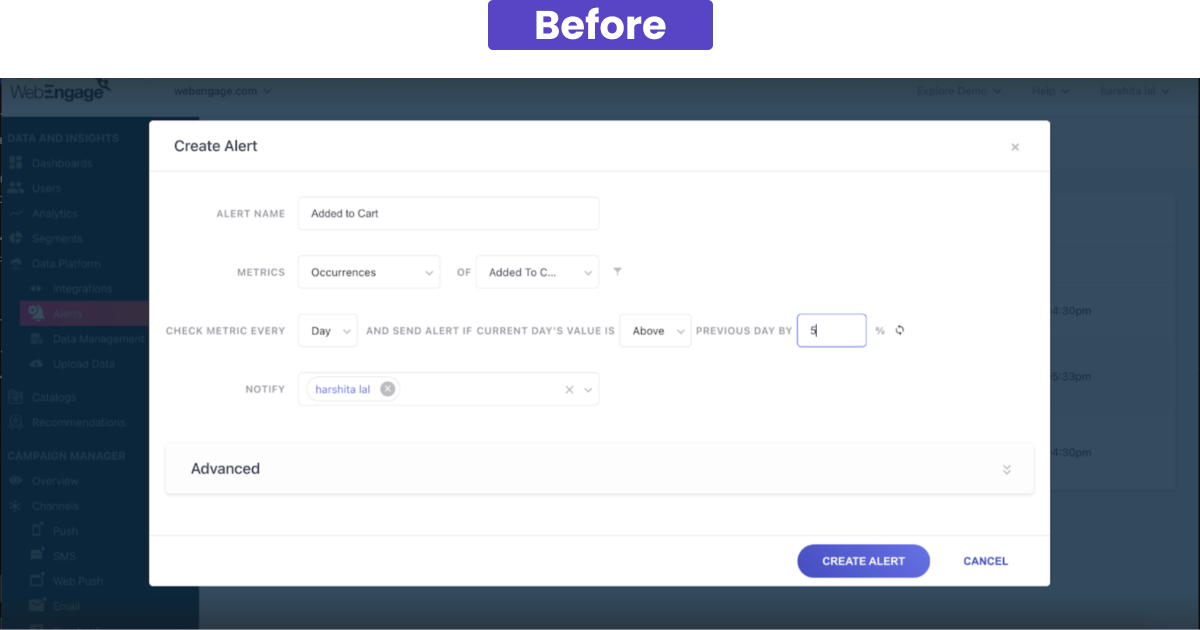
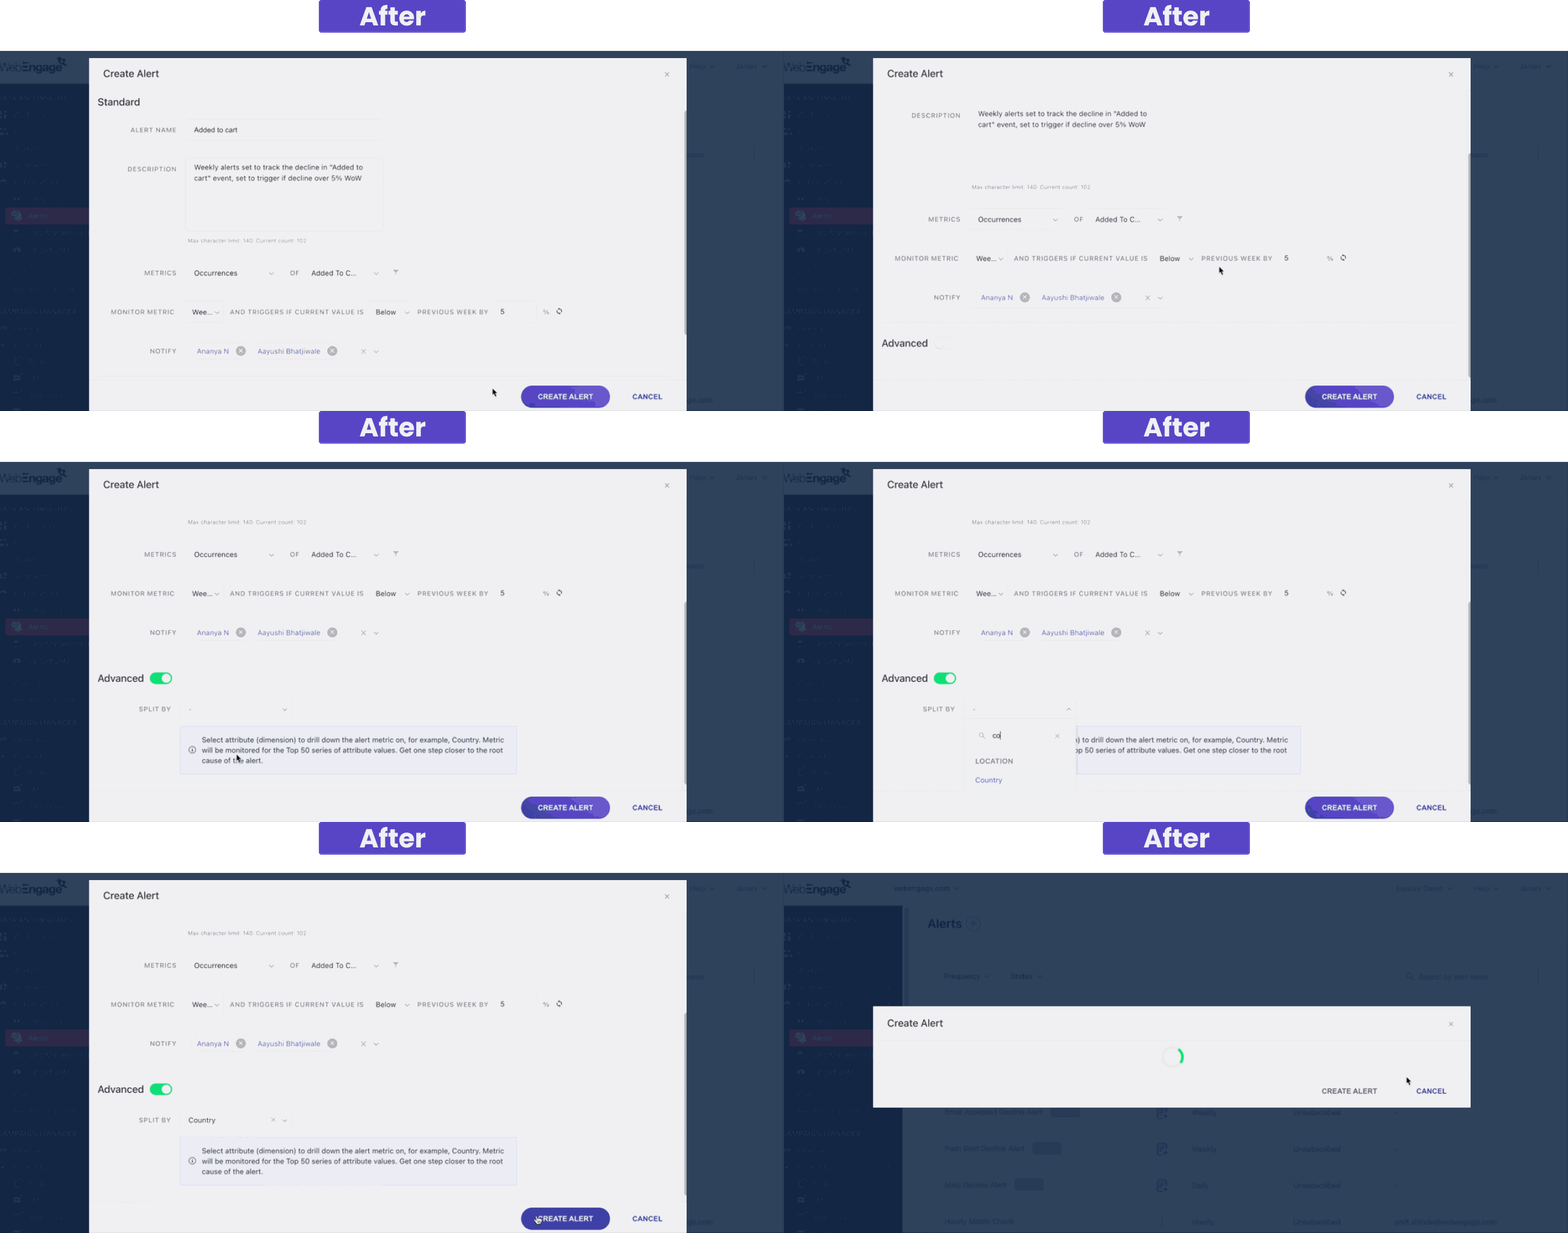
On the tech end: The advanced option will now have a toggle switch. Users can view the advanced option only by toggling the switch to make it active.
With the split by option, you can split an alert based on different data types, such as city, country, platform, etc. This can be useful when you want to track metrics for different segments of the user base or when you want to receive notifications for threshold breaches in specific geographic locations or platforms.
How it benefits you: Greater flexibility and more granular control over the metrics to track, ensuring you receive notifications for the metrics that matter the most.
Before:
After:
5. Copying Alerts
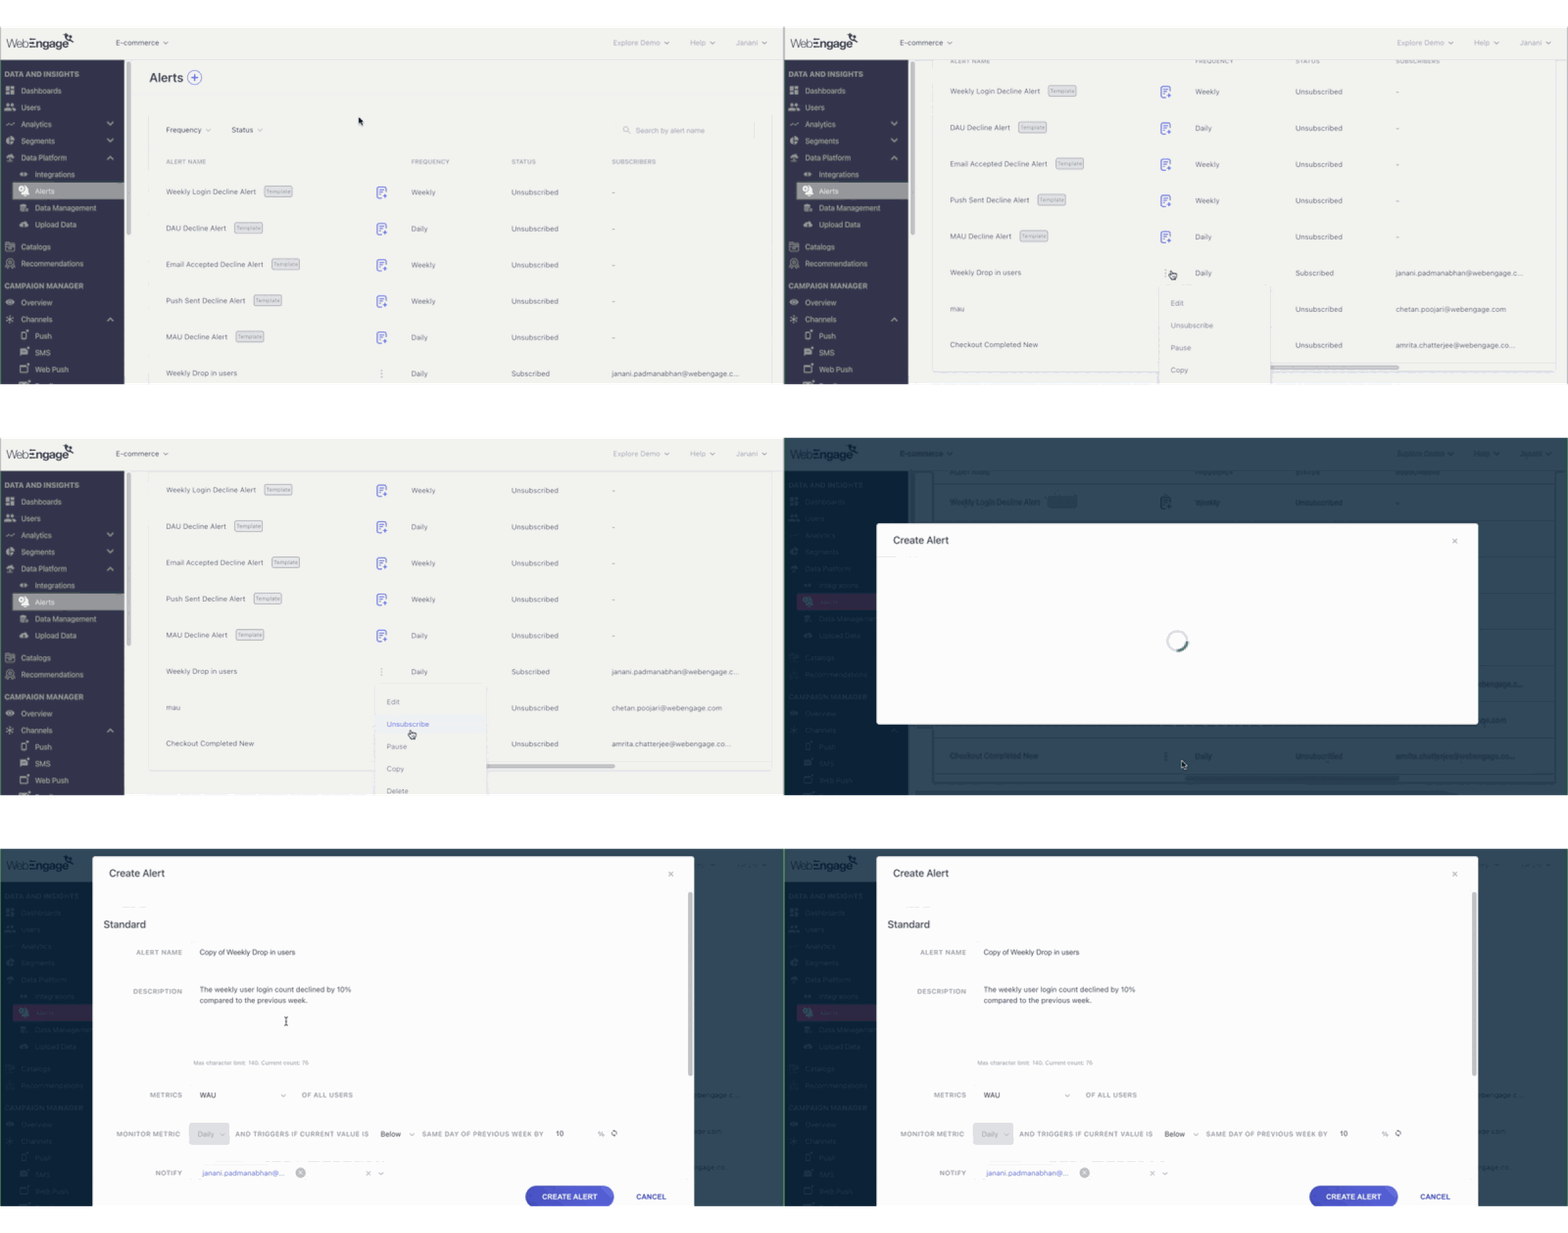
What that means: By copying existing alert configurations, you can quickly set up similar alerts without the need to recreate them from scratch, saving time and effort.
On the tech end: Once copied, the user will be taken to the CRUD, where all the values will be prefilled, and the user can edit these values and create a new alert from them.
How it benefits you: Reduce time to create similar alerts, facilitate customization, and edit copied alerts to specific monitoring needs or scenarios by adjusting the parameters or thresholds as necessary.
Conclusion
Delivering targeted and personalized messages at crucial moments empowers marketers to create more engaging and meaningful interactions.
With more granular tracking abilities with Custom Alerts, businesses can now tailor their alert strategies with even greater precision, ensuring that messages are timely and highly relevant to individual user preferences and behaviors. This level of customization enhances user experience and maximizes the impact of marketing efforts.
Explore these features today, contact us at product@webengage.com, and visit the Knowledge Base for more information.




 Harshita Lal
