We’re excited to announce Vajro’s integration with WebEngage to help mobile app businesses drive better engagement and sales.
Please note: Vajro is a Mobile Application Development Platform (MADP) on Shopify. Hence the plug-and-play integration of the Vajro app is only available for WebEngage Shopify Plugin clients.
As mobile commerce continues to grow at an unprecedented rate, it’s more important than ever to have a mobile app that offers a seamless user experience and drives conversions. With Vajro’s integration with WebEngage, you can now leverage advanced automation and personalization capabilities to reach your customers across all channels and devices and drive meaningful interactions that keep them coming back for more.
Moreover, you can now harness the power of this platform within your Vajro app and take your mobile app business to new heights.
Here are some of the key benefits of Vajro’s integration with WebEngage:
- Hyper-personalize push notifications and in-app messages using customer events data.
With WebEngage’s powerful segmentation and targeting capabilities, you can deliver highly personalized and relevant messaging to your users based on their behavior, preferences, and other contextual data, by capturing data on 15+ user events
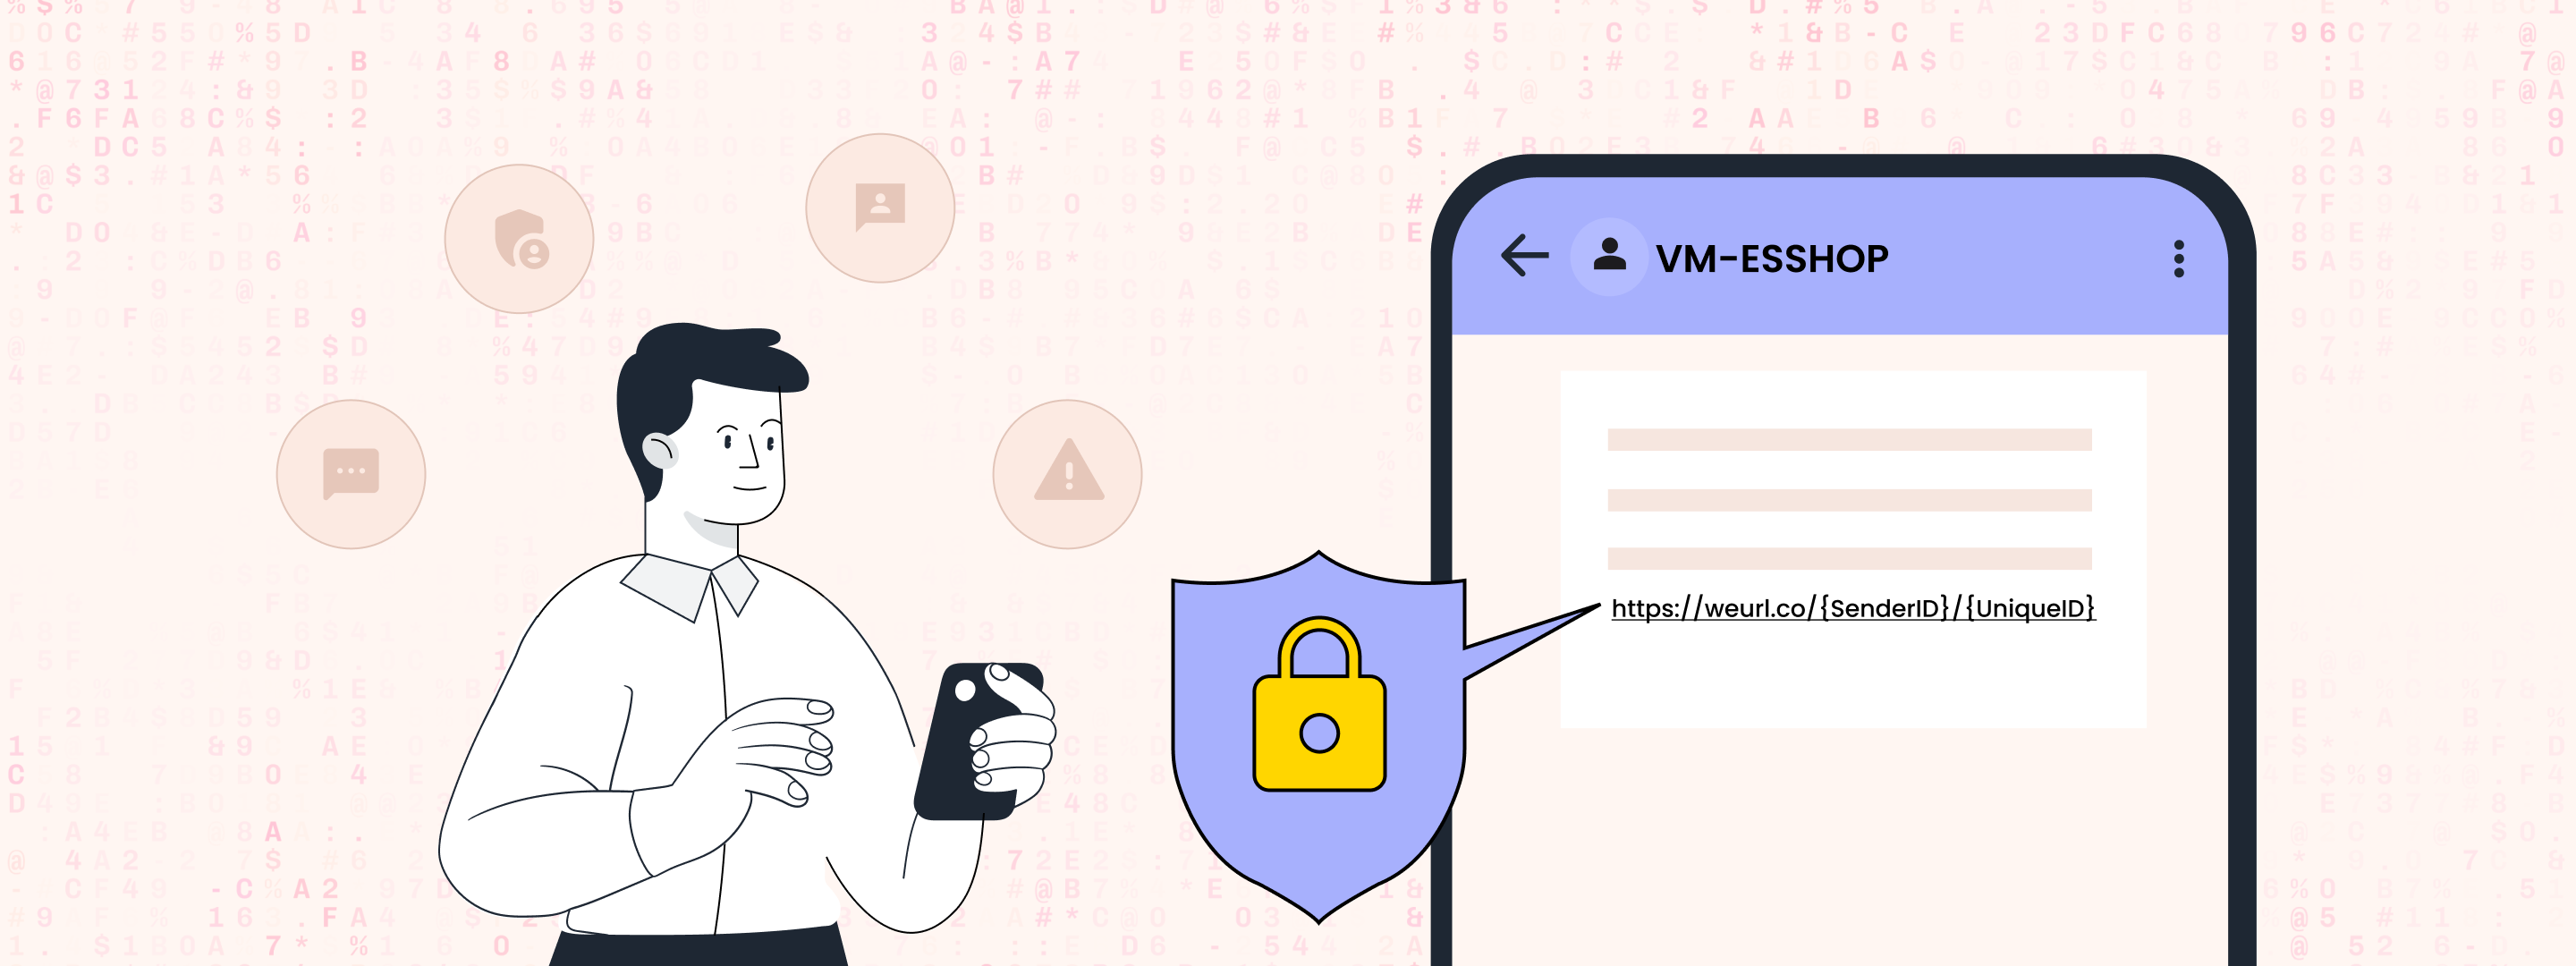
Vajro’s integration with WebEngage allows you to leverage customer events data captured within Vajro’s app to deliver truly personalized messages that strike a chord with your users, and drive engagement and sales.
- Feed first-party data into a segmentation engine to identify and launch targeted campaigns and increase LTV.
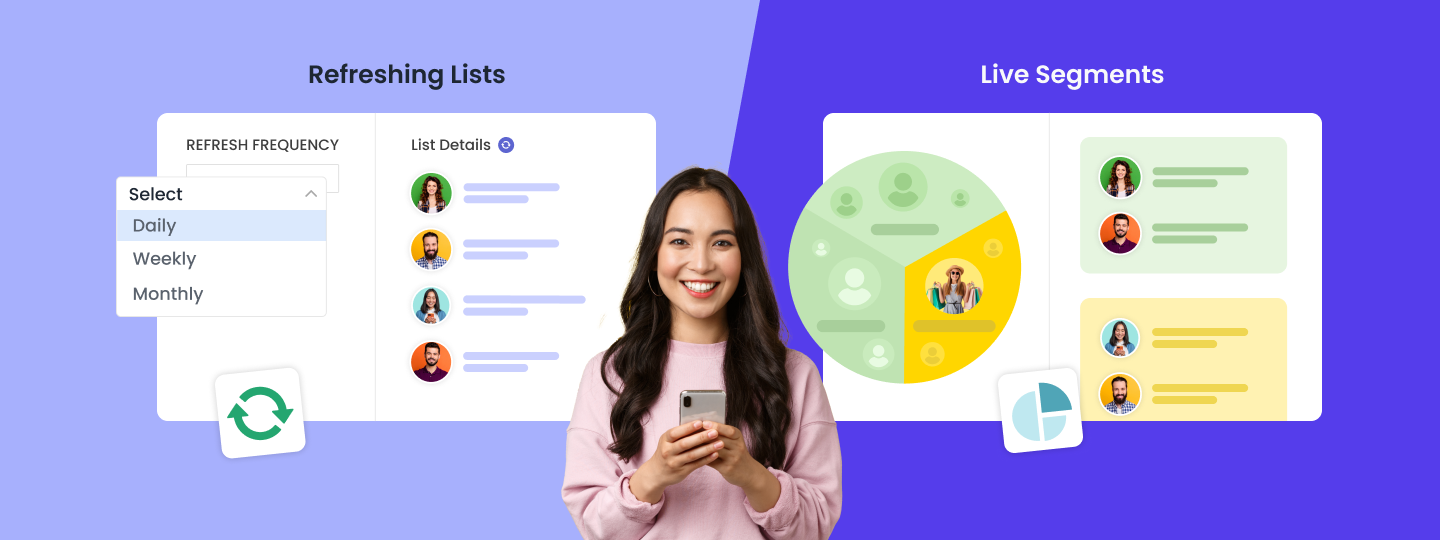
By feeding your Vajro app’s first-party data into WebEngage’s powerful segmentation engine, you can create targeted campaigns that resonate with your users and drive higher lifetime value (LTV). Whether you want to target high-spending customers or users who have abandoned their carts, Vajro’s integration with WebEngage makes it easy to identify and engage with these users more intimately.
- Engage contextually throughout your customers’ journey with omnichannel engagement tools and drive more conversions.
Thanks to Vajro’s integration with WebEngage, you can now engage your users throughout their entire journey – from discovery to purchase and beyond – using powerful omnichannel engagement tools. Whether you want to send a contextual push notification to welcome new users or follow up on a targeted email campaign after a purchase, Vajro’s integration with WebEngage makes it easy to create a cohesive and personalized experience for your users that drives more conversions.
Getting started with Vajro’s integration with WebEngage is easy
1. How To Enable The Integration:
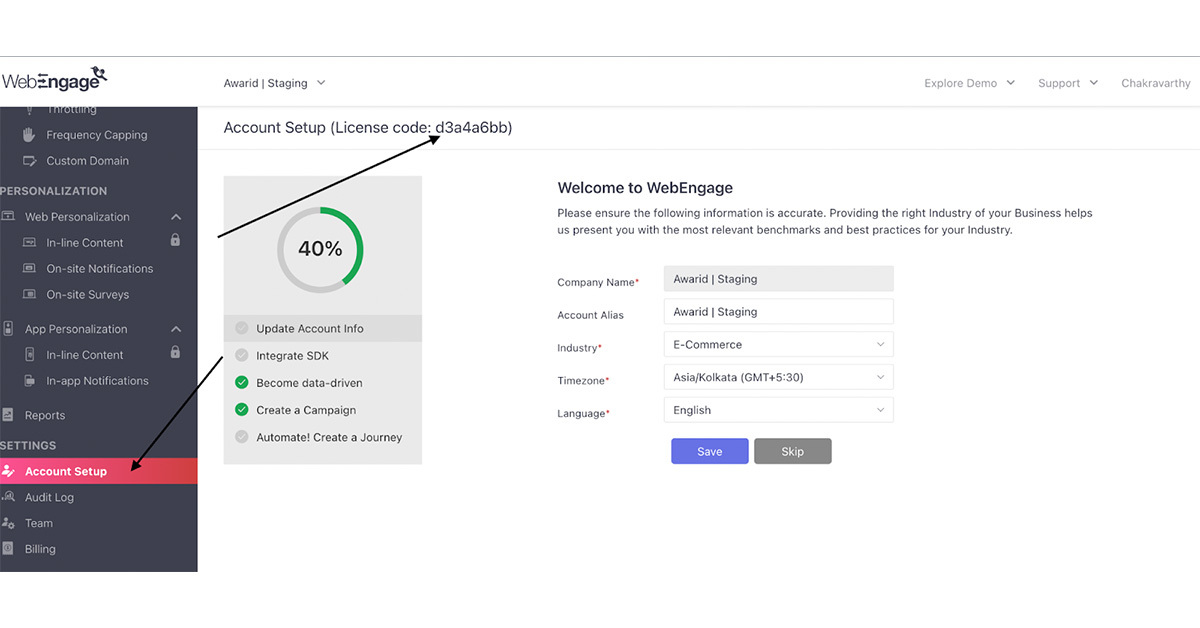
- Step 1: Head to Account Setup on your WebEngage dashboard -> copy the License code mentioned on the page.
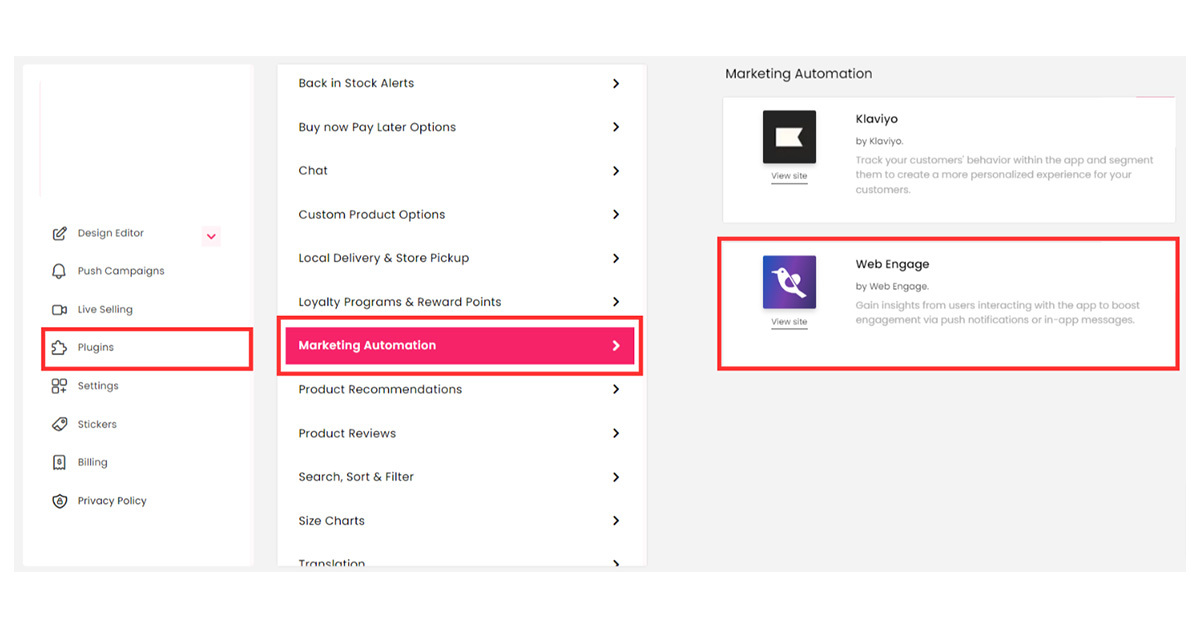
- Step 2: Go to the Plugins section on your Vajro dashboard -> find WebEngage under the Marketing Automation category.
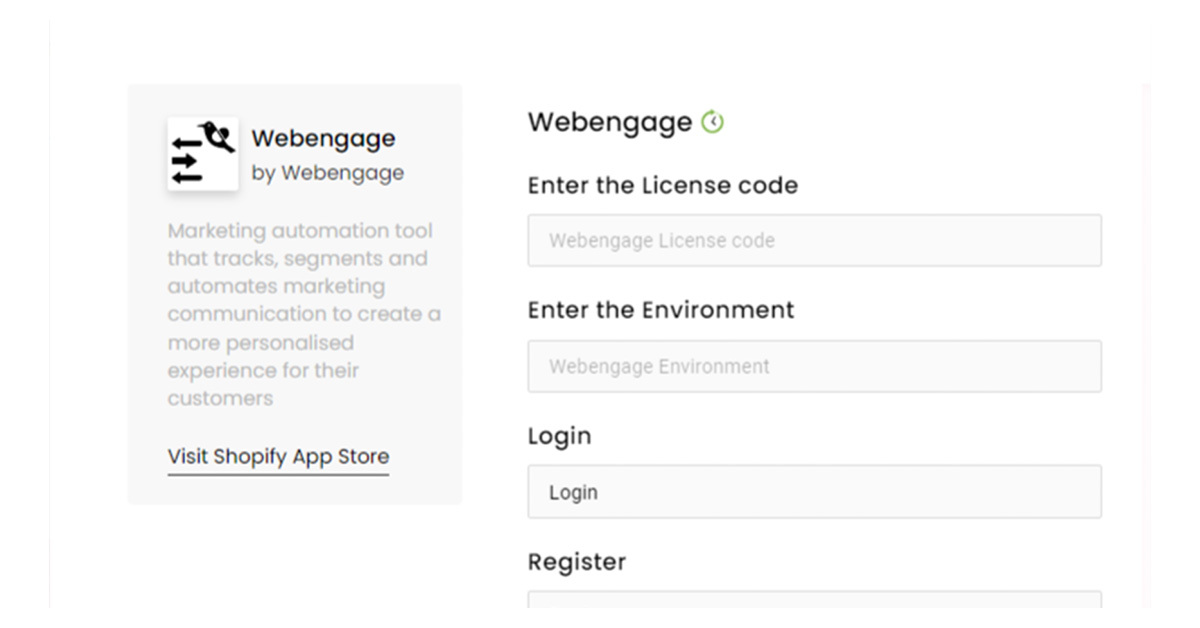
- Step 3: Paste the License code acquired from the WebEngage dashboard in the dialogue box.
WebEngage Environment: At the time of login, the data center’s value should be added in the Environment field.
- Default for Global (Default)
- IN for India
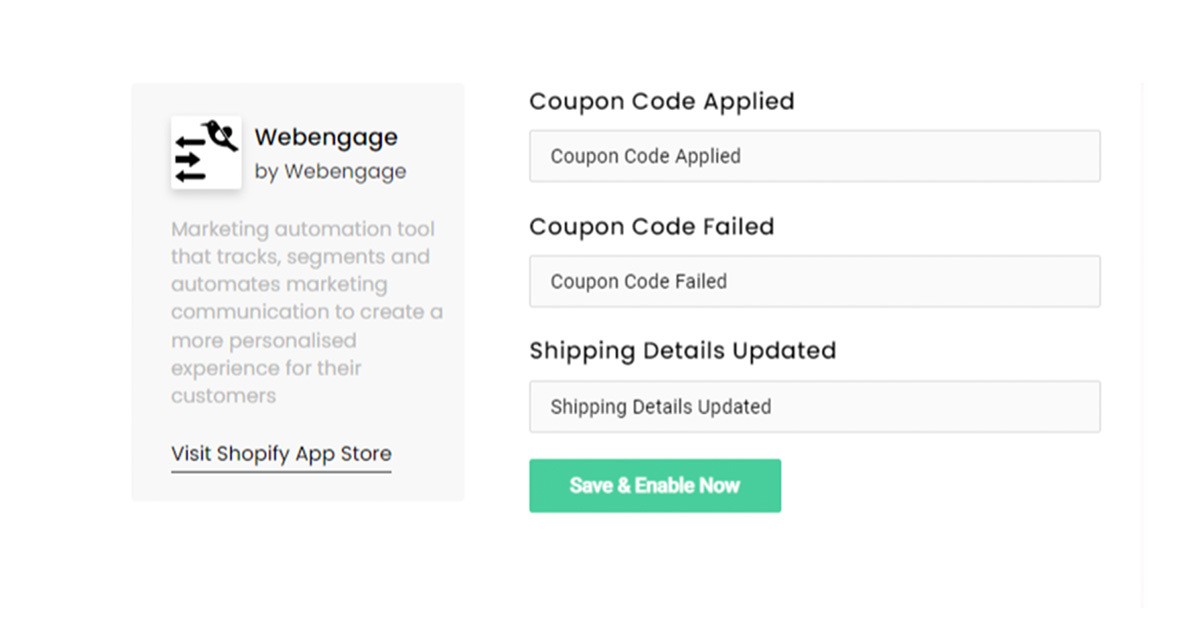
- Step 4: Rename the event names as per your requirement -> click on Save & Enable Now.
Note: Please update your app if necessary.
2. Create An In-App Campaign
- Creating an In-app campaign is similar to creating a push campaign. Under Personalization, click on App personalization and then click on In-app notifications.
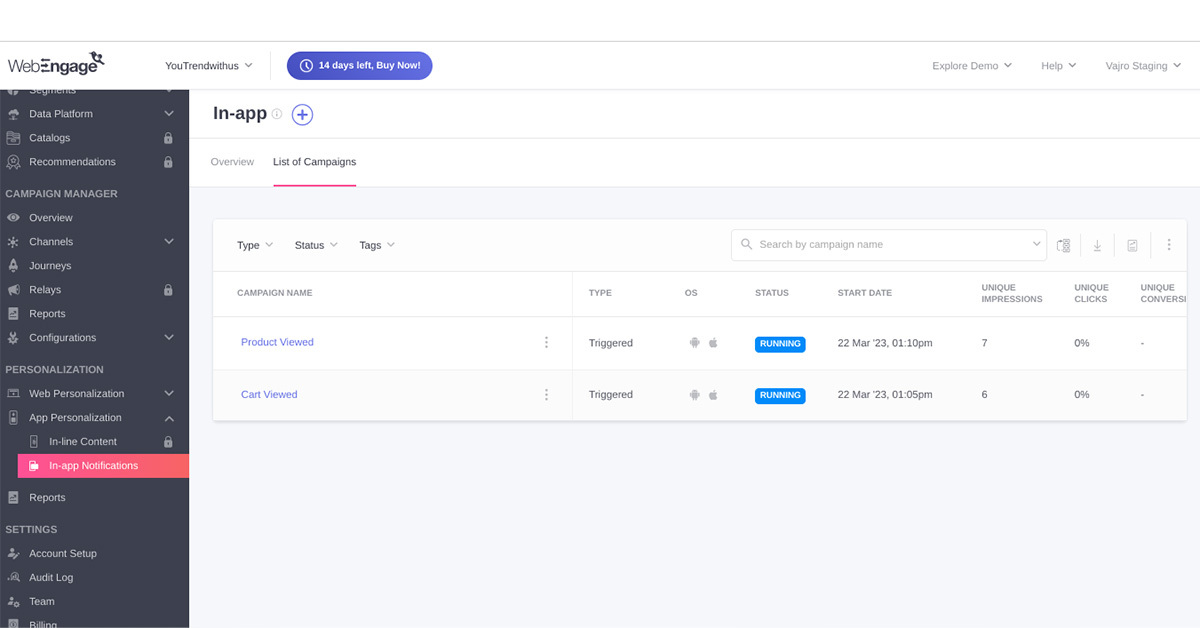
- Click on the plus icon and start creating the campaign.
Note: In in-app messaging, all the layouts are supported in both OS.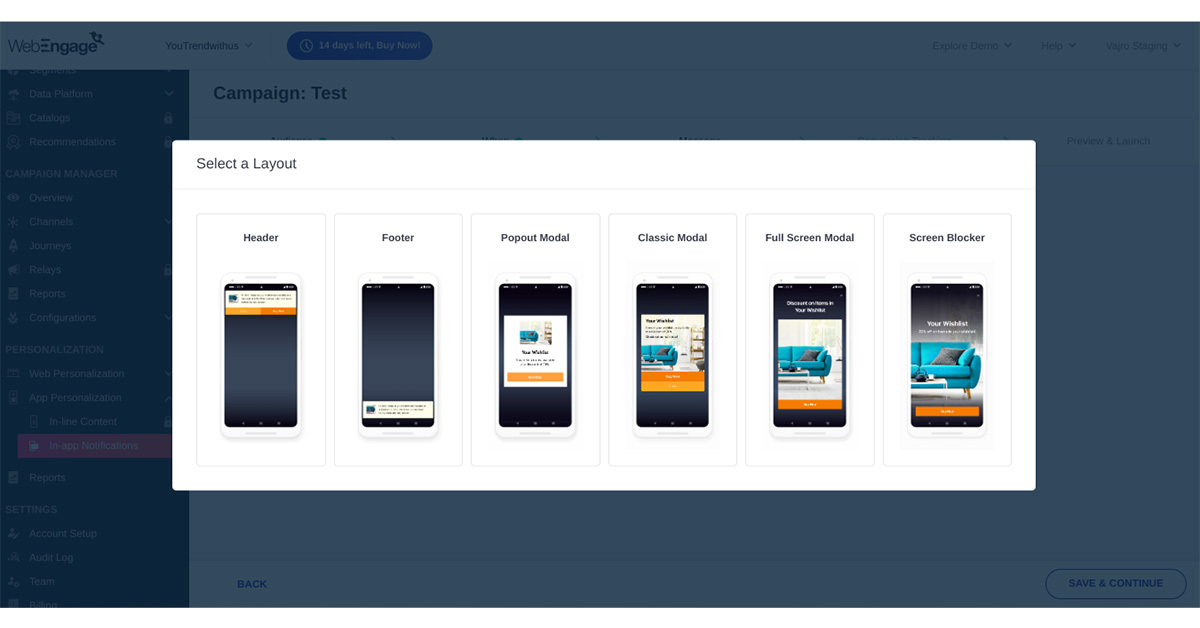
To know more about tracking events, creating a segment, and creating a push campaign, click here.
Setting up push notifications for Android devices
Upload the Package Name and App Secret on the WebEngage dashboard. Follow the steps shown below.
- Step 1: Log in to your WebEngage dashboard and navigate to Data Platform -> Integrations -> Push Setup (Configure) -> Channels.
- Step 2: In the Push tab, select OS as Android
- Step 3: Add the applications Package Name in Package Name Column
- Step 4: Go to the Firebase console -> Enable Cloud Messaging -> Get the Server key -> Add the Server key in the App Secret Column
- Step 5: Click Save
Setting up push notifications for iOS devices
Upload the APNs Auth Key on the WebEngage dashboard. Follow the steps shown below.
- Step 1: Log in to your WebEngage dashboard and navigate to Data Platform -> Integrations -> Push Setup (Configure) -> Channels.
- Step 2: In the Push tab, select Auth Key as APNs Authentication Type. Upload the APNs
- Auth Key file that was generated earlier along with the Team ID and Bundle ID (check in Xcode)
- Step 3: Select the default push mode for sending push notifications, either Production and Click Save.
Once integrated, you can start leveraging WebEngage’s powerful automation and personalization features within your Vajro app to start engaging with your users in a more meaningful way.
To get the most out of your integration, here are some tips:
1. Define your goals: Before you start using the integration, define your marketing goals and objectives, and tailor your messaging and campaigns accordingly.
2. Segment your users: Use WebEngage’s segmentation and targeting features to group your users based on their behavior, preferences, and other criteria and deliver tailored messaging that resonates with each group.
3. Experiment and optimize: Test different messaging and campaign strategies to see what works best for your audience, and use WebEngage’s data-driven insights to optimize your campaigns and drive better results over time.

In summary, Vajro’s integration with WebEngage is a powerful tool for mobile app businesses looking to improve their engagement.
In case you need any help in getting started with the integration, please reach out to your Customer Success Manager or write to us at support@webengage.com.



 Harshita Lal
 Sanjay Mishra